Steps
-
Log in to your Webnode account.
-
Go to your project:
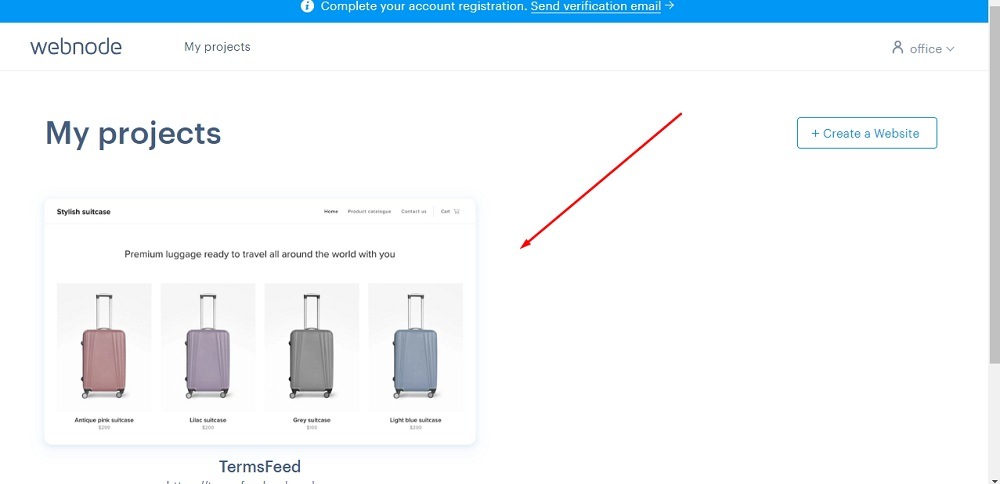
-
Click Edit site:
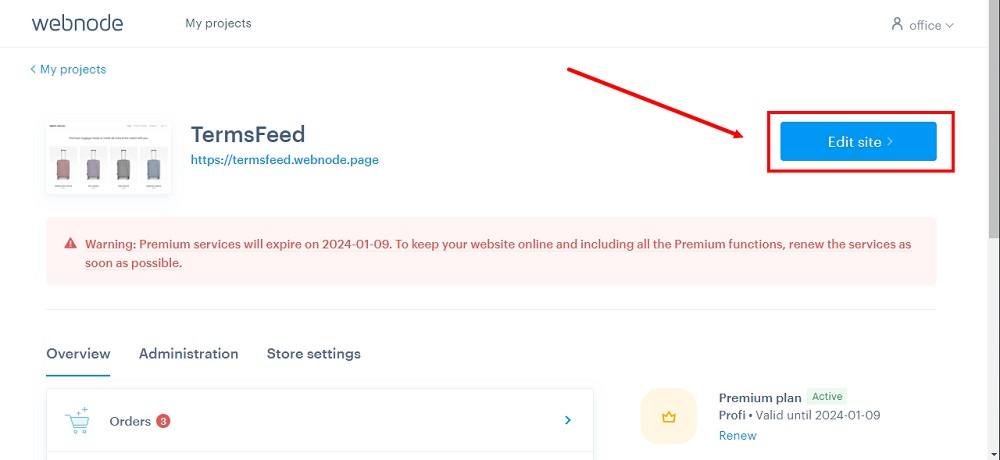
-
Click Pages in the top menu:
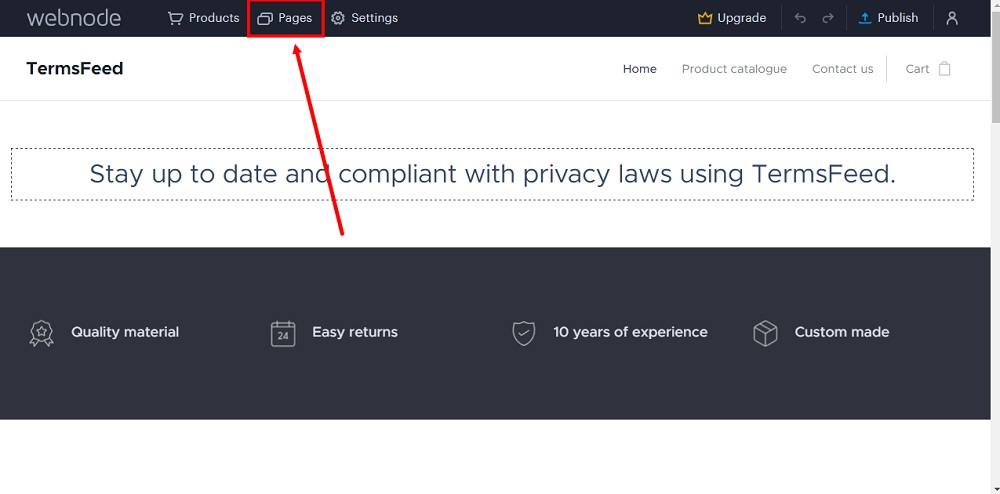
-
Select the Terms and Conditions page and click Edit at the bottom of the dialog window:
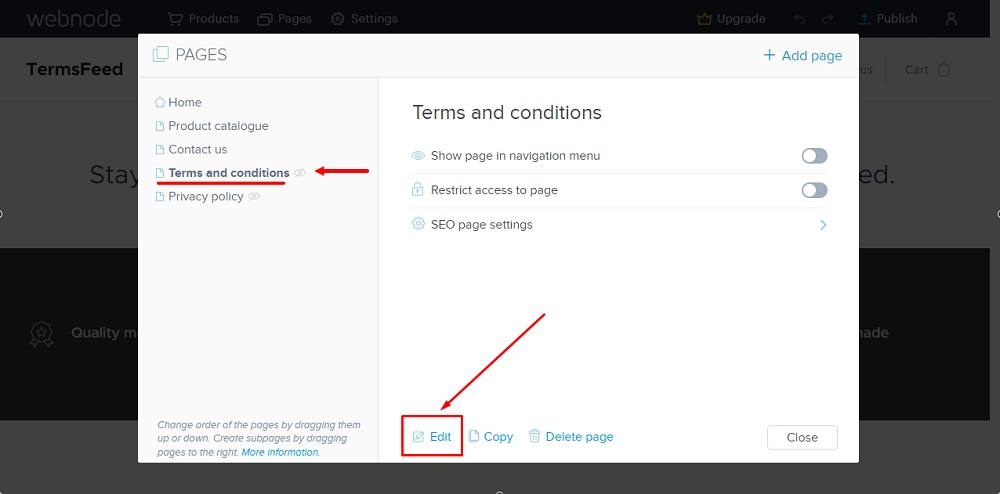
-
The default text template from Webnode will open. Click anywhere in the text area so that the editing options show and then click on the delete icon:
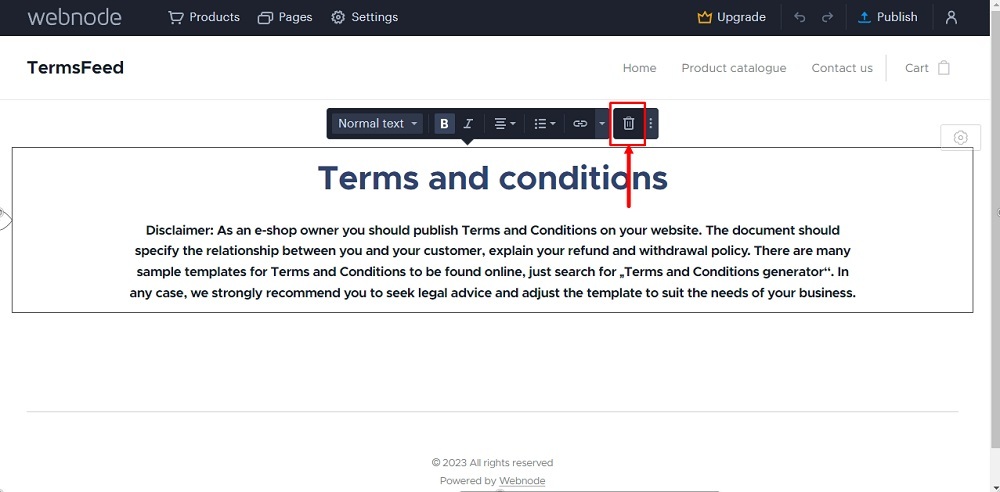
-
Click Delete again:
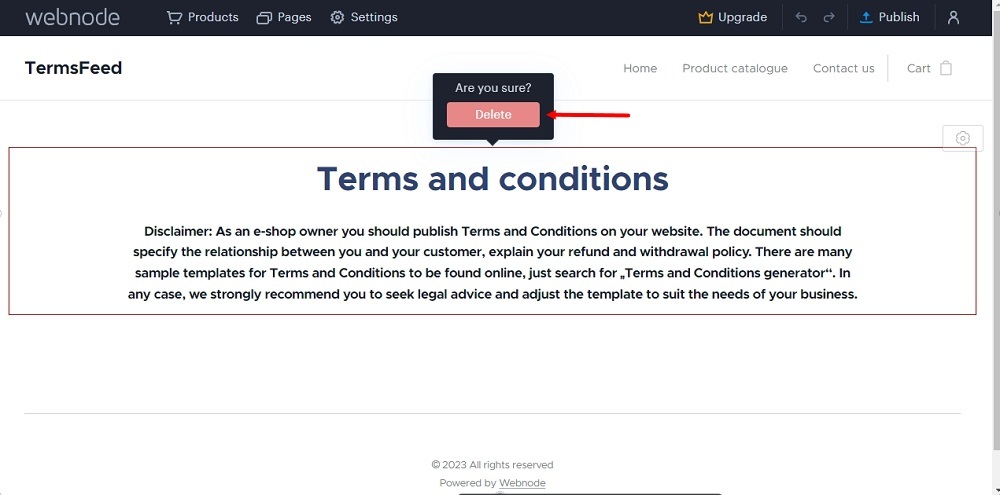
-
In the empty page, click on the Plus icon to add content. Select HTML:
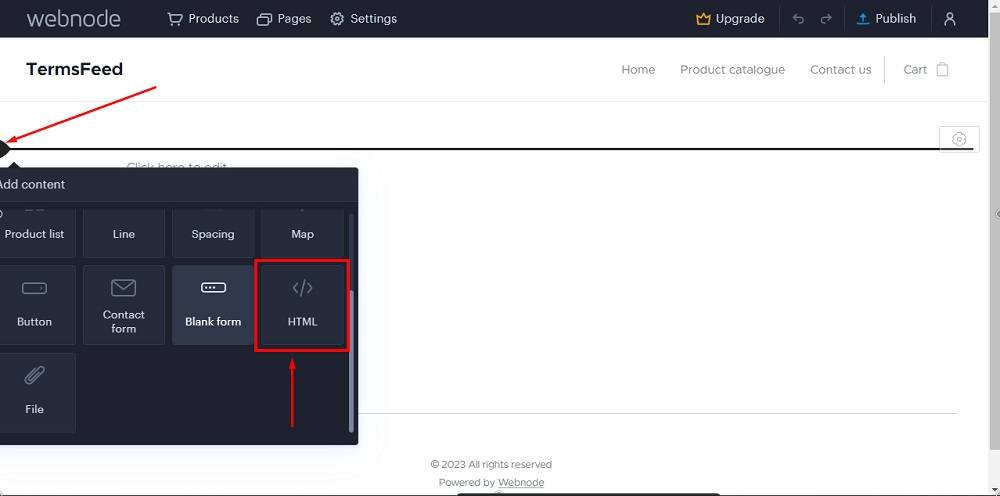
-
Insert HTML field will show:
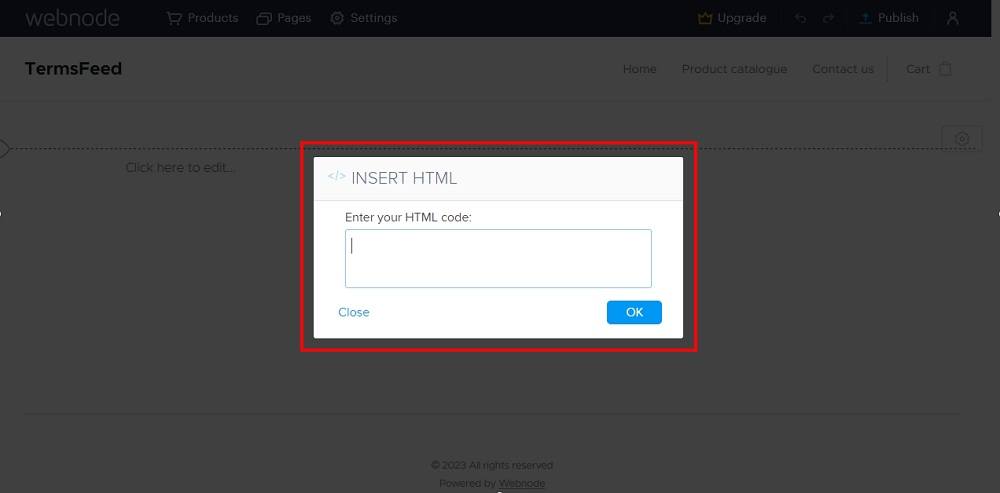
-
Add the text of your Terms and Conditions. It needs to be in HTML format.
If you do not have a Terms and Conditions, you can use our Terms and Conditions Generator and create it within minutes.
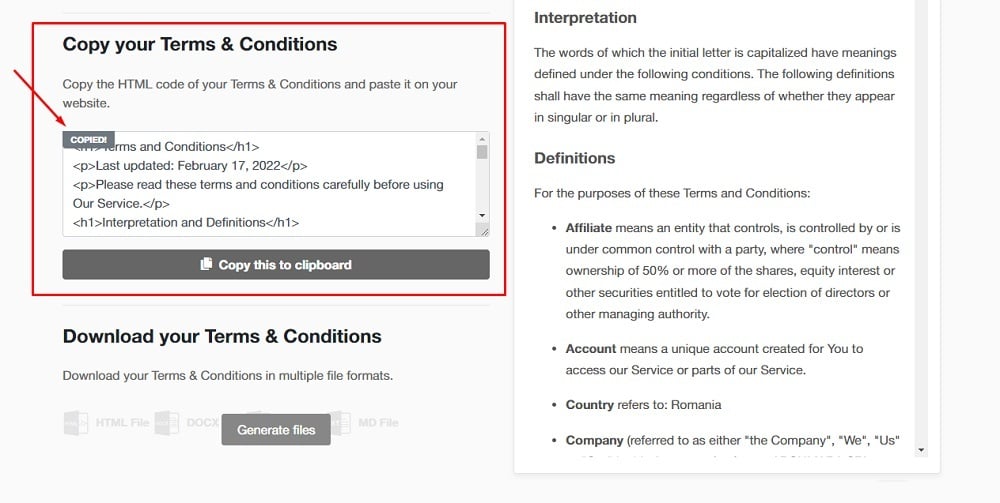
Once you have the Terms and Conditions created by TermsFeed, let's get the agreement text. Under the Copy your Terms and Conditions section, click on Copy this to clipboard:
-
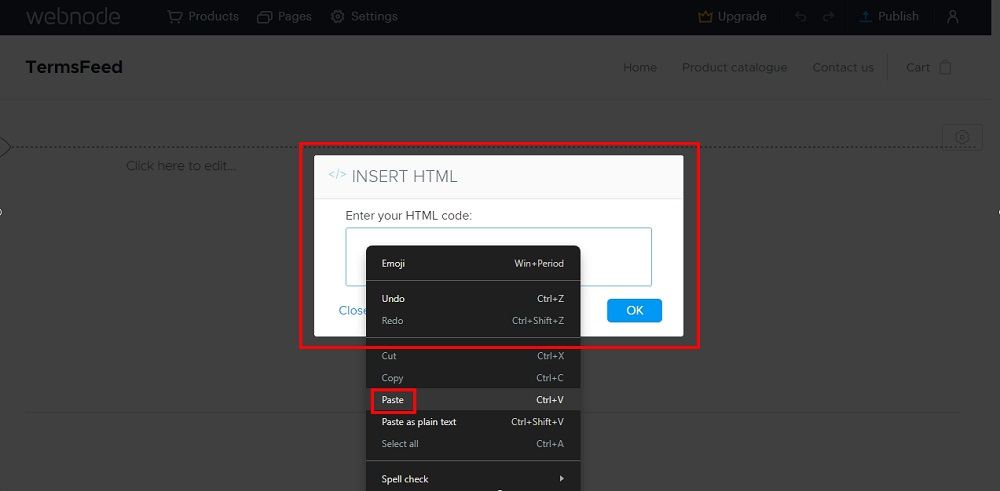
Paste the HTML code of your Terms and Conditions in the Insert HTML field:
-
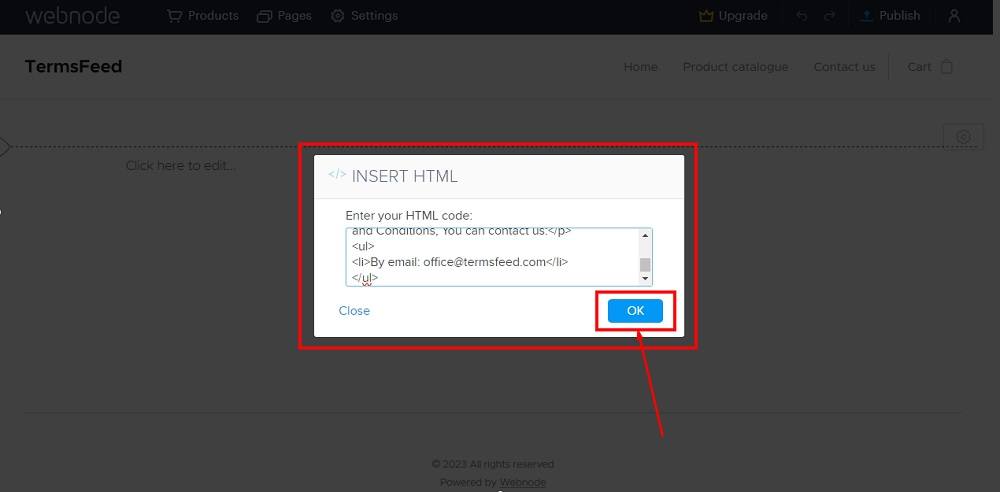
Click OK:
-
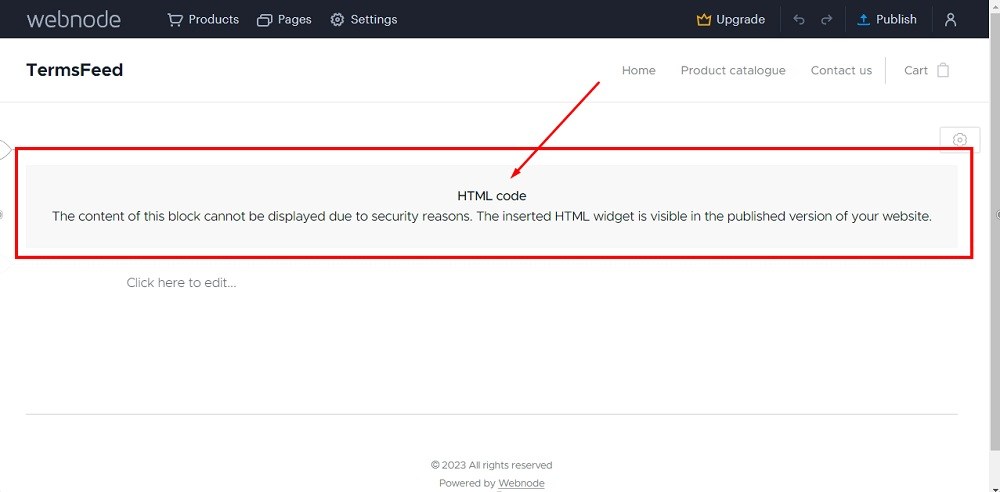
The HTML code widget will show during preview. Content will be visible in the published version of your site:
-
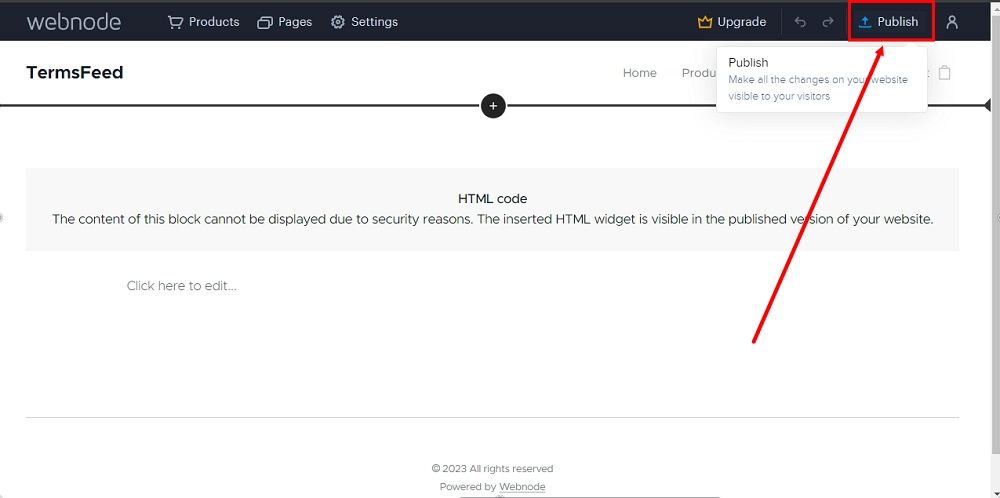
Click Publish:
-
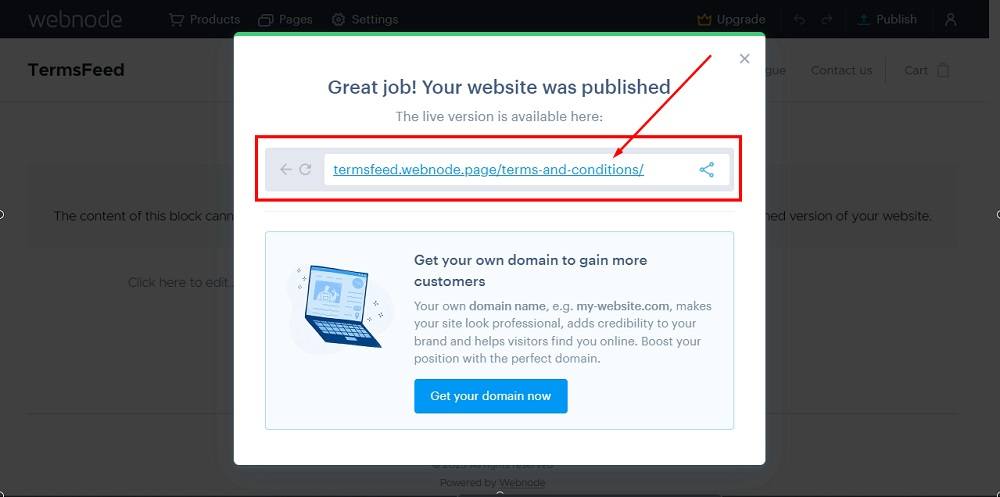
Click on the link to visit the updated legal page:
-
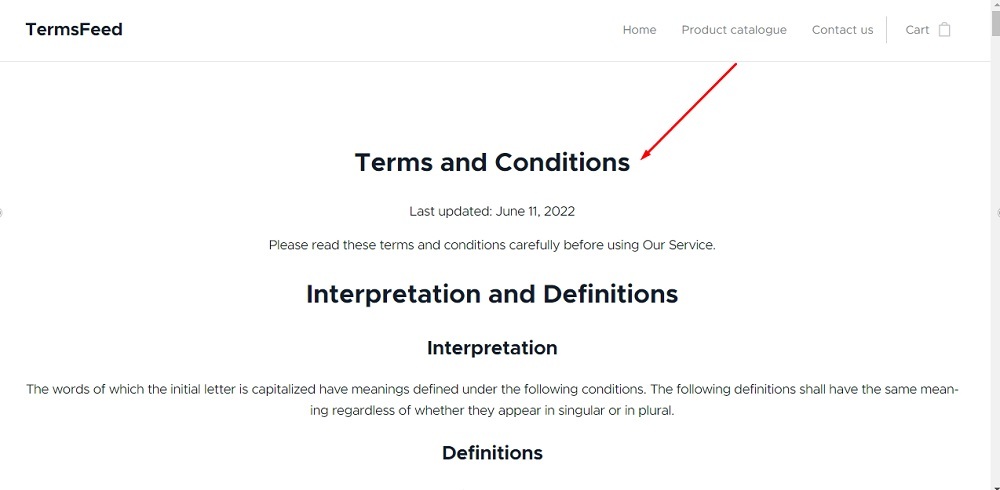
The newly created Terms and Conditions page is now available:
-
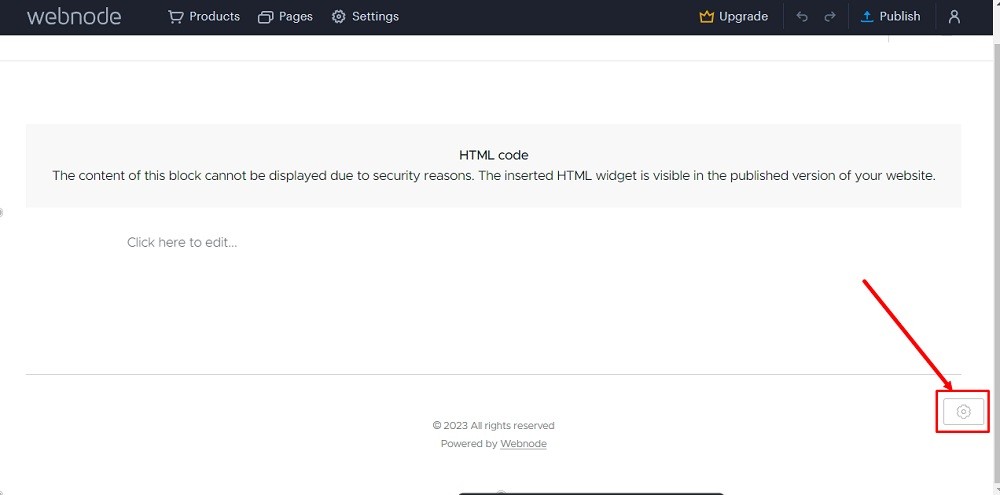
Now from the footer section on the page click on the gear icon to open the settings:
-
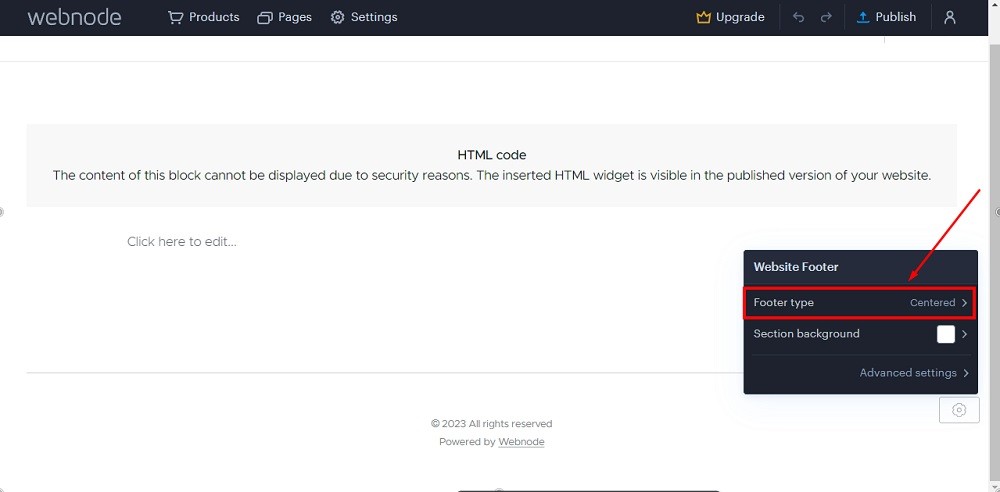
Click on the Footer type to edit the type of the footer:
-
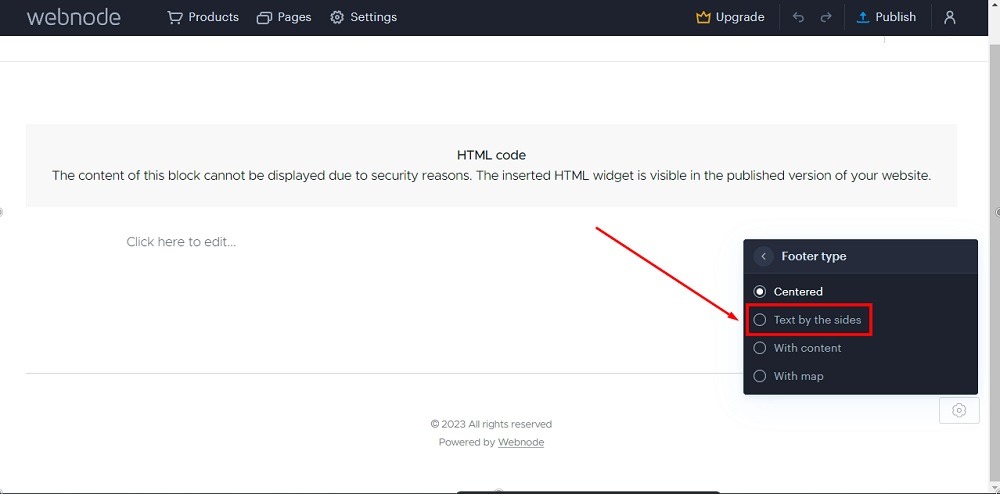
Select the Text by the Sides option:
-
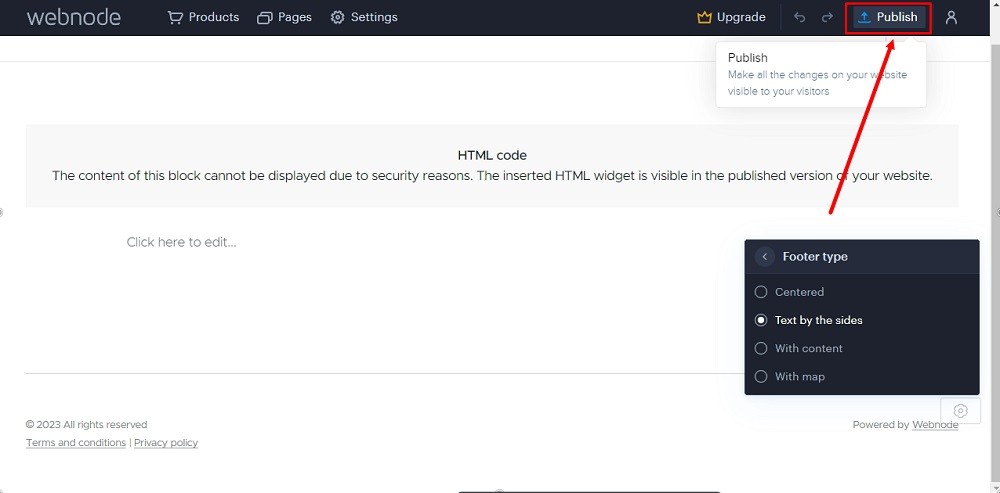
Go to the Publish button to save changes:
-
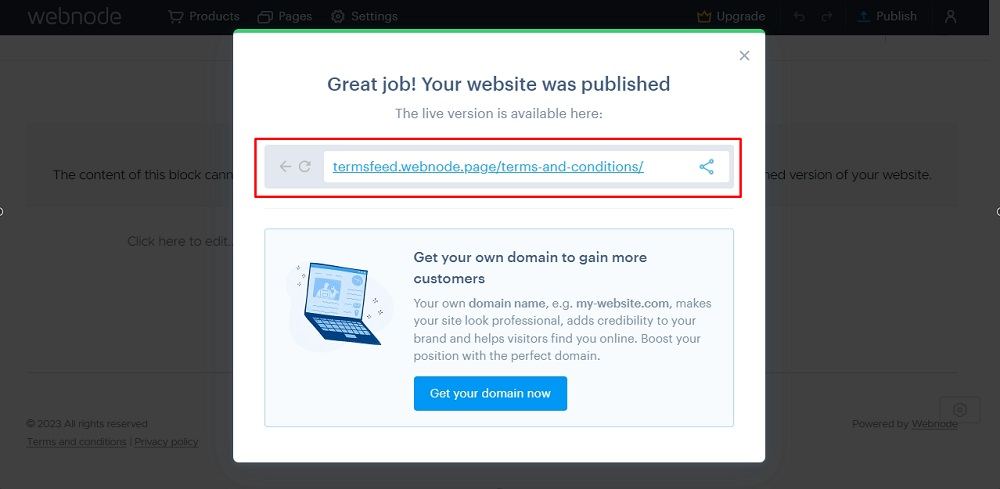
Click on the page again:
-
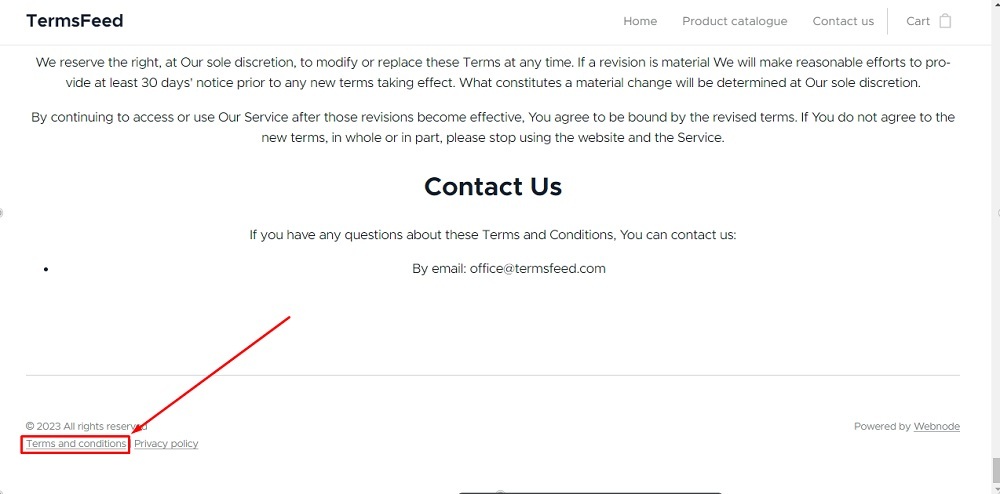
Your new section with the linked Terms and Conditions page is displayed on your Webnode website:
