In this video you will learn how to:
- Disable the current links at the footer section
- Add a new Block (Footer Links) with a new external URL
- Add a new Widget (Footer Links)
- Display your Privacy Policy URL at the footer
Note: In this example we've used Magento 2 (version 2.4.7), open source version, installed on a Windows 11 machine.
Step 1. Disable the existing footer links of the current theme
-
Go to the Magento 2 folder on your machine.
In our case, it's the "termsfeed" folder. Follow the path: vendor > magento > module-cms > view > frontend > layout to get to the
default.xmlfile.In the "layout" folder find the
default.xmlfile and open it: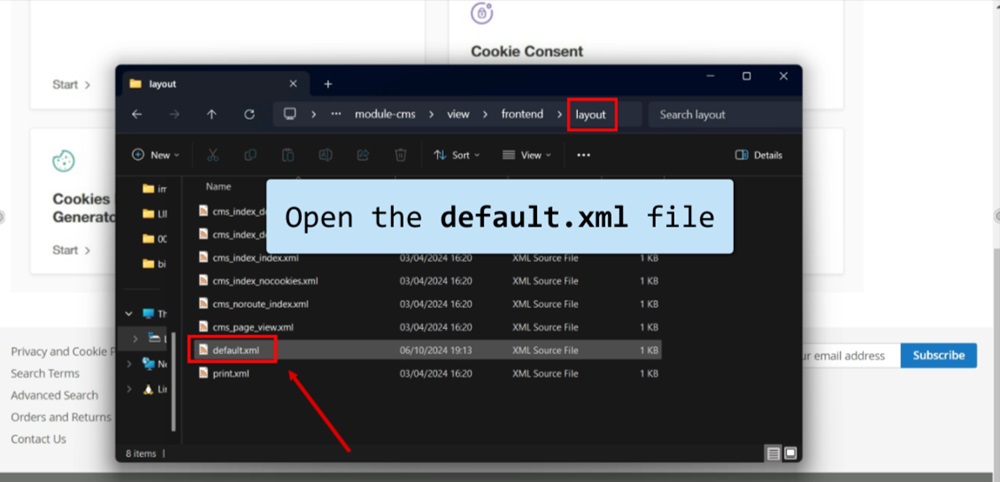
-
Add a new parameter -
remove="true"- on line 13 in the default.xml file: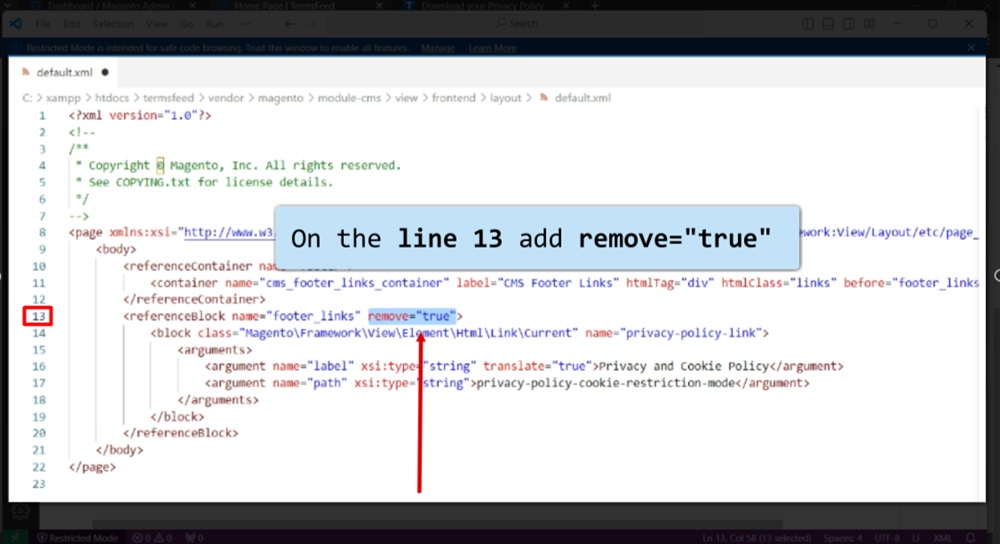
-
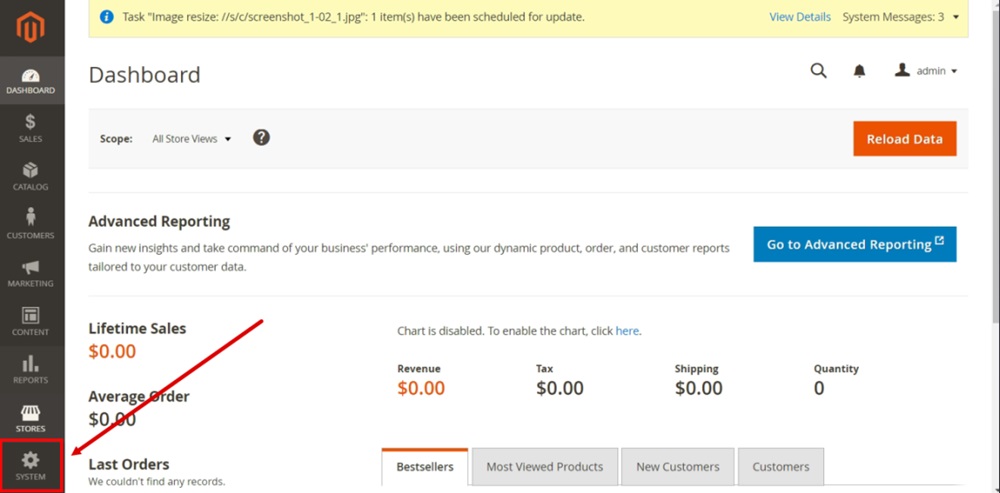
Go to the Magento's Dashboard and clear the cache. To do so, go to System:
-
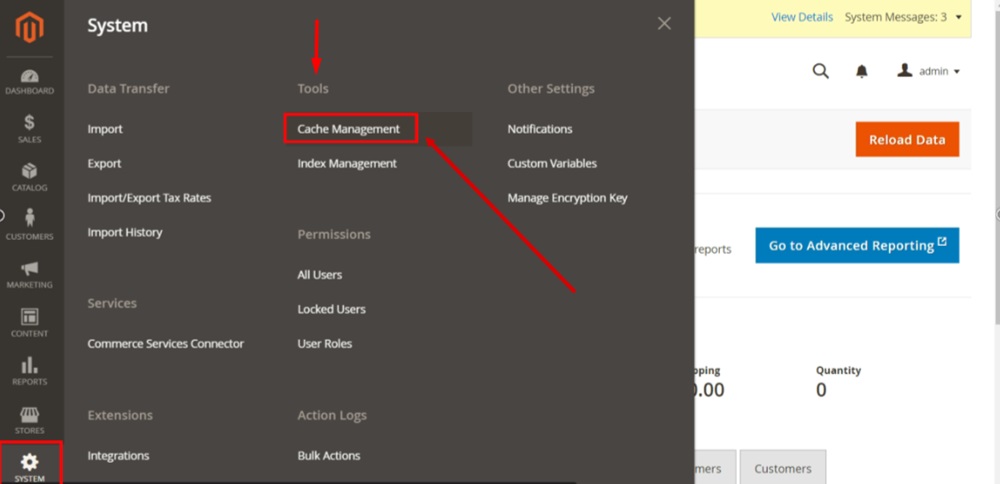
Select Cache Management under Tools:
-
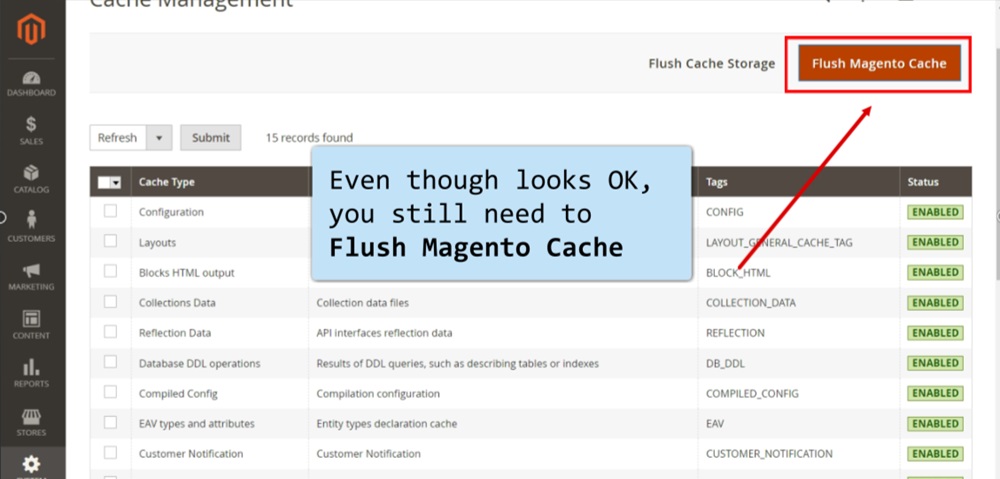
Even though all looks OK, you still need to Flush Magento Cache:
-
Reload the page to see changes:
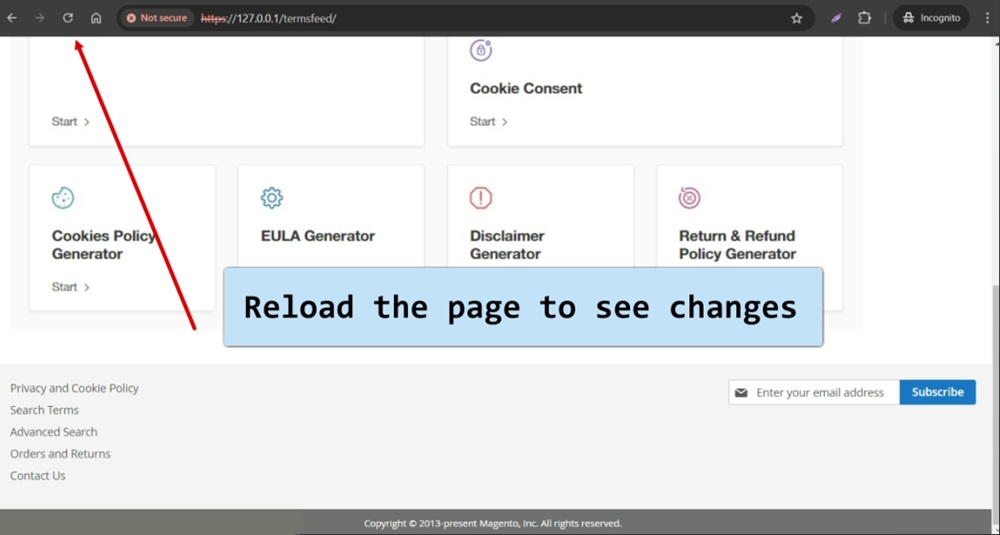
The existing links in the website footer are removed now. The next step is to create a new block with an external URL. It will be your Privacy Policy URL.
Step 2. Add a new Block and an external URL
-
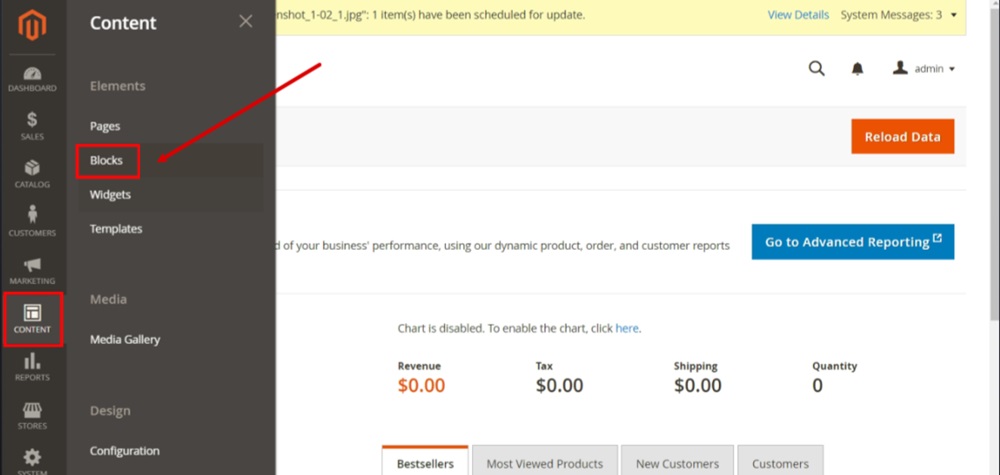
Go to Content and select Blocks:
-
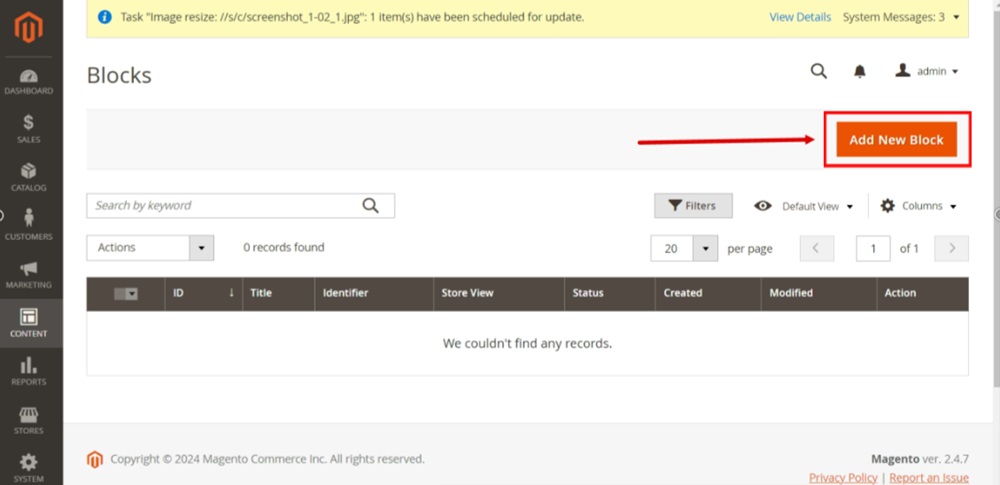
Click the "Add New Block" button:
-
Fill in the required fields for the New Block settings:
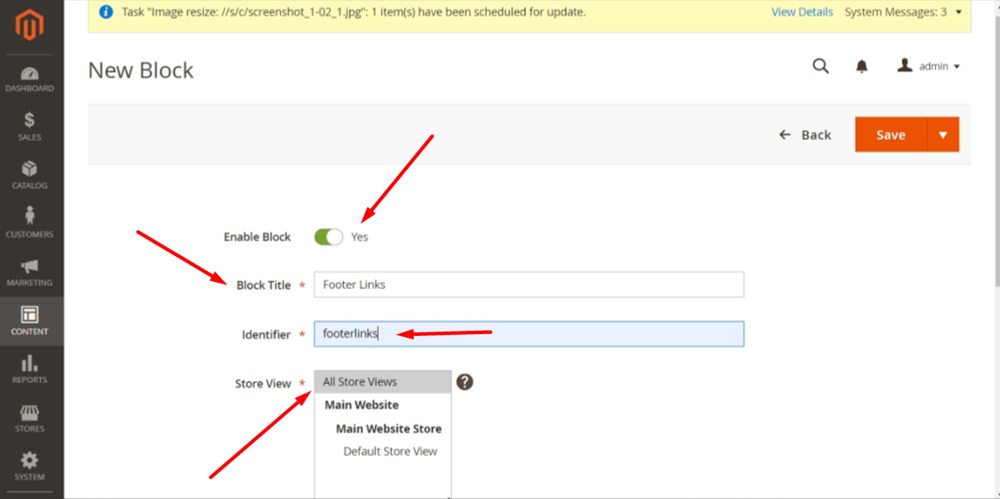
The required fields are:
- Make sure that "Enable block" is enabled
- Add "Block Title." For example, "Footer Links"
- Add "Identifier." For example, "footerlinks"
- Select the "Store View." For example, "All Store Views"
-
Scroll down and click on the "Edit with Page Builder" button:
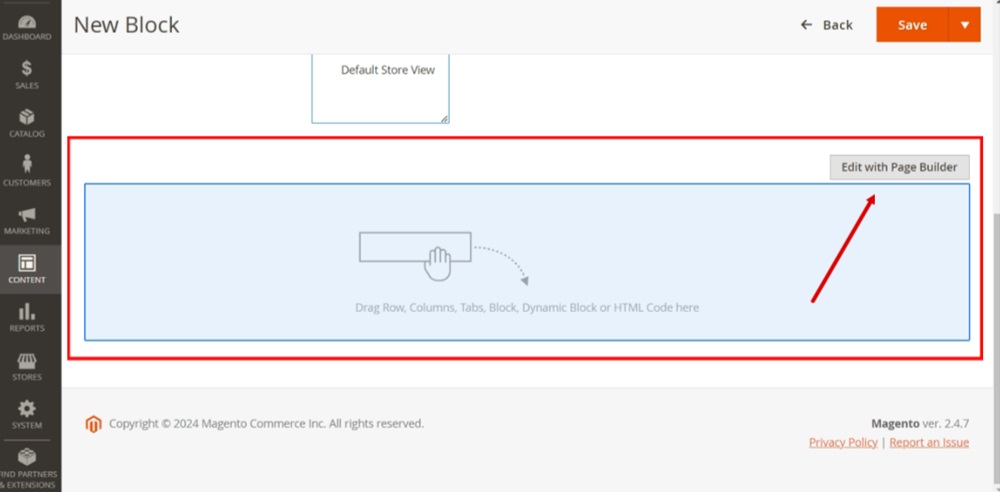
-
Drag and drop the Row layout in the page editor:
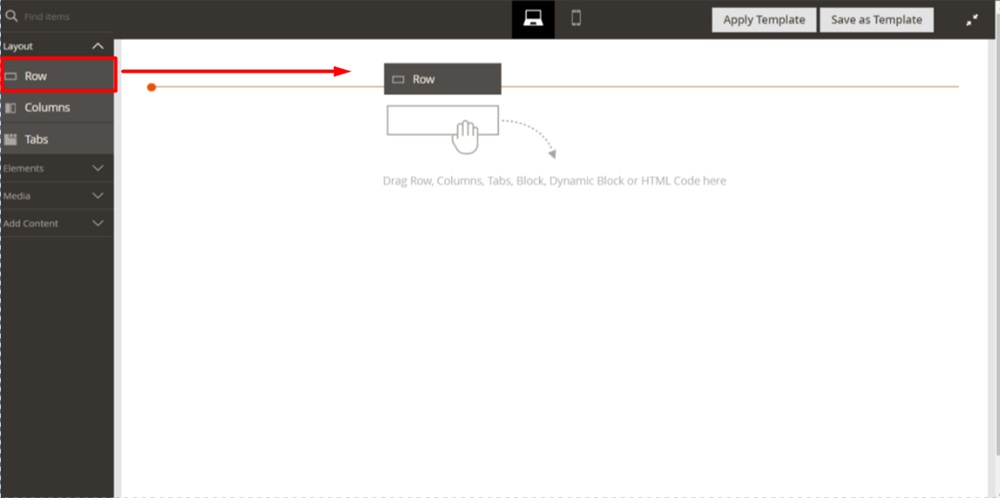
-
Open the Elements section and drag and drop the Text element in the row (in the page editor):
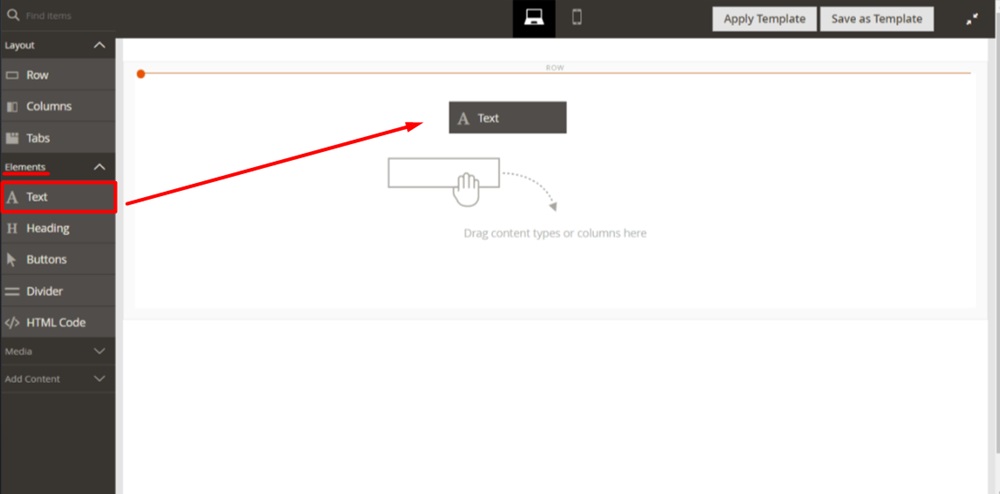
-
Select the Link icon from the editor:
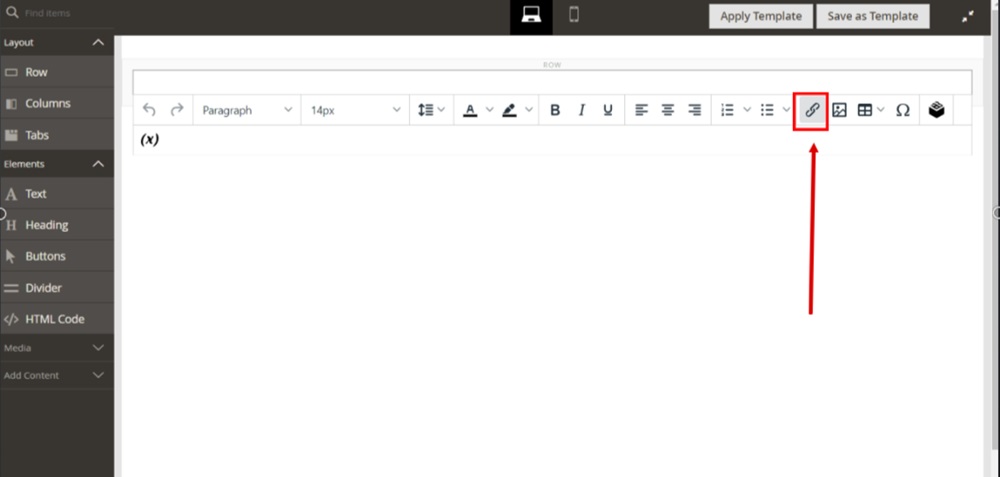
-
The Insert/Edit Link window opens. Fill in the fields:
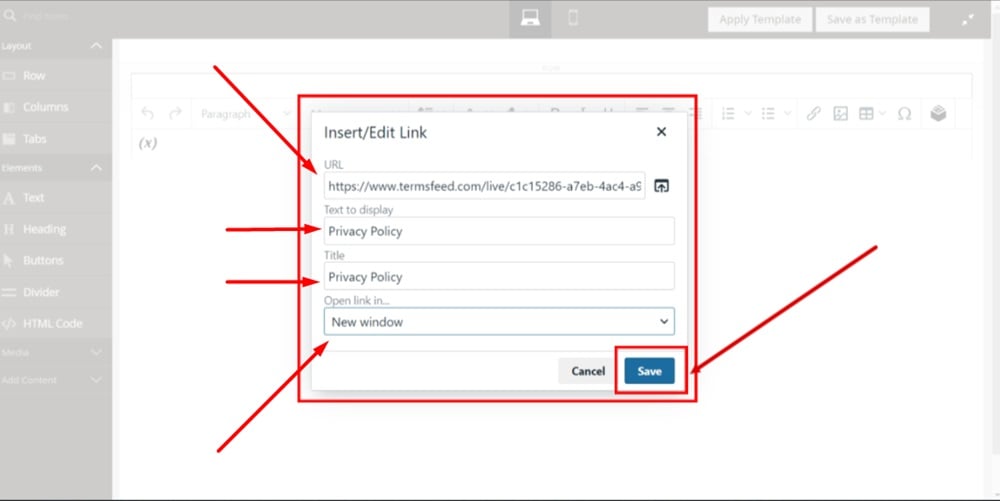
In our example, we'll show how to add an external Privacy Policy URL to your Magento 2 website. Add the following:
-
In the "URL" field paste the Privacy Policy URL
-
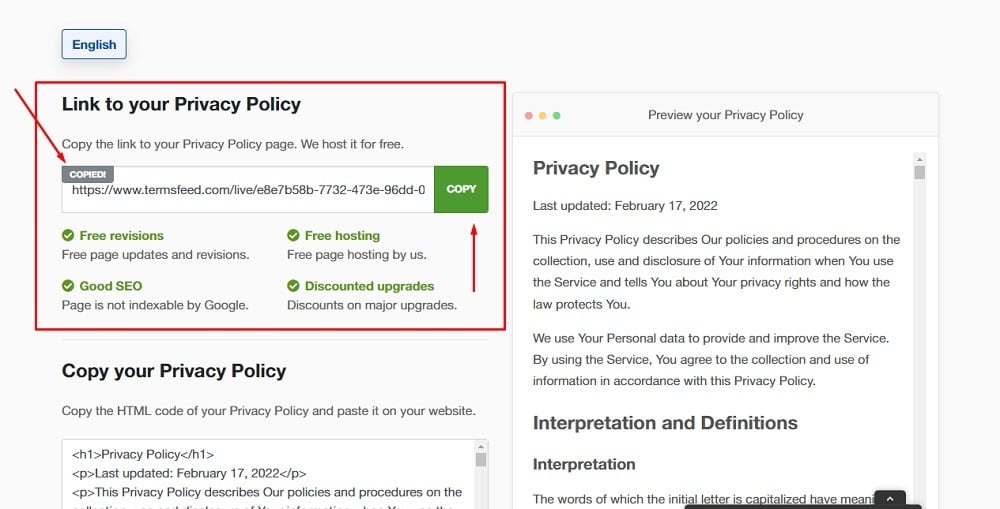
To get a Privacy Policy URL link, go to the TermsFeed Privacy Policy Generator to create a Privacy Policy and get the hosted Privacy Policy URL.
Once you have a Privacy Policy created by TermsFeed, click Copy from the Link to your Privacy Policy section to copy the URL:
-
- In the "Text to display" type "Privacy Policy"
- In the "Title" field type "Privacy Policy"
- In the "Open link in" section select one between "Current window" or "New window" (dependably how you want your link to open)
- When done, click Save
-
-
Click Save (in the New Block editor):
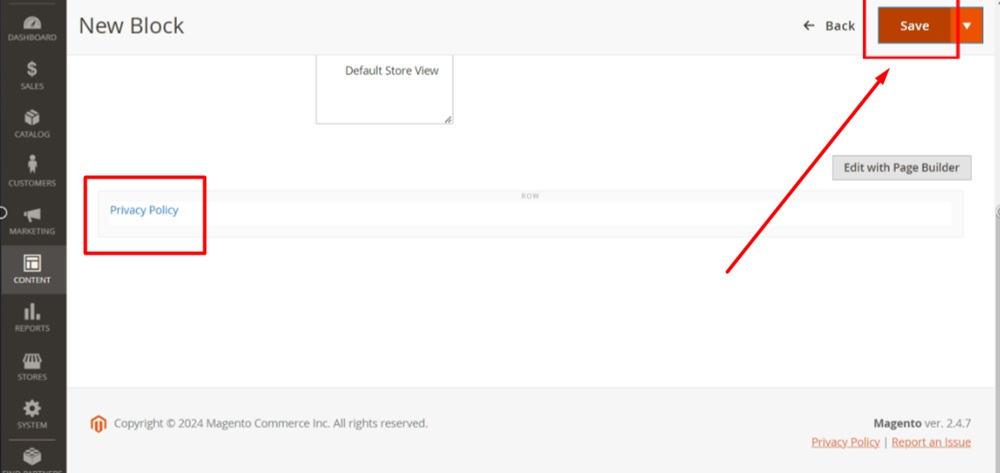
The Footer Links Block is now created.
In order to display the link to the Privacy Policy in the footer we first need to create a new Widget and add this newly created Block to the Widget. To do so, continue with Step 3. below.
Step 3. Create a new Widget (Footer Links)
-
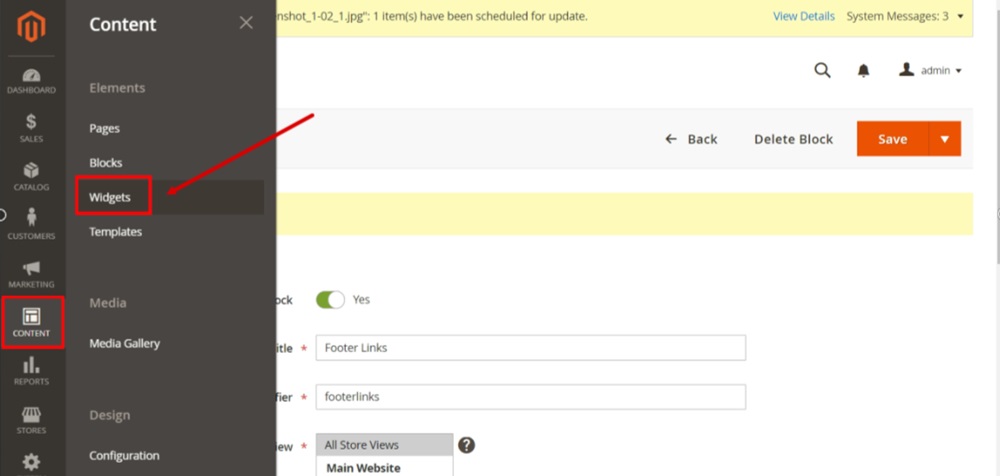
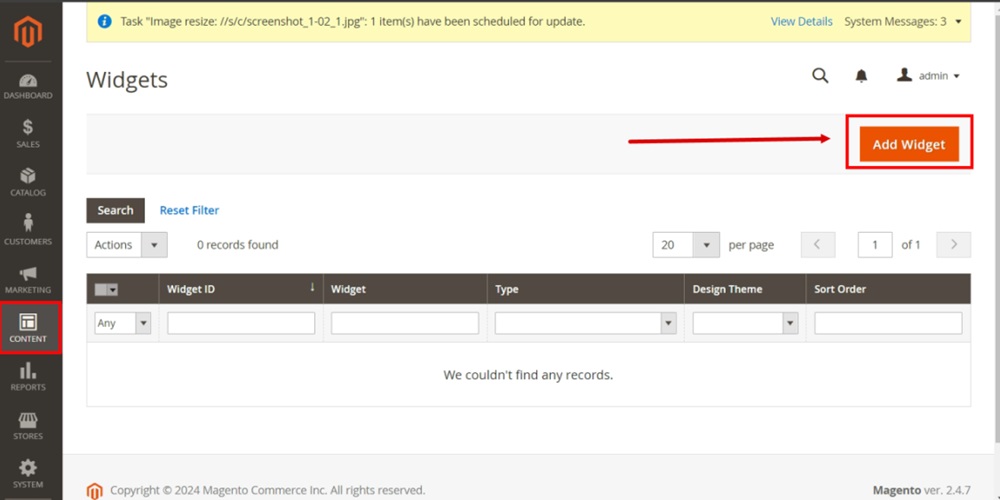
Go to Content and select Widgets:
-
Click "Add Widget" button:
-
Adjust the Widget Settings:
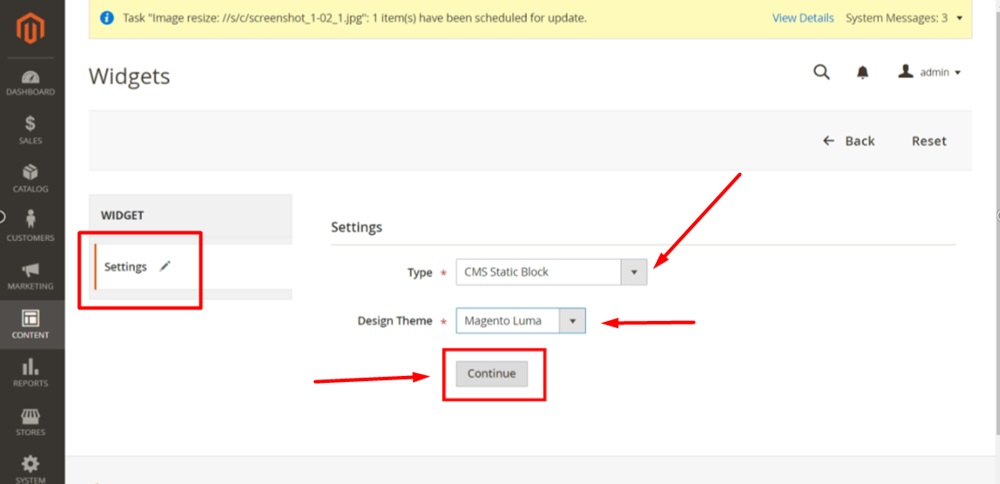
In the Widget Settings section adjust the following:
- From the "Type" dropdown menu select the "CMS Static Block"
- From the "Design Theme" dropdown menu select your theme
- When done, click the "Continue" button
-
Adjust the Widget Storefront Properties:
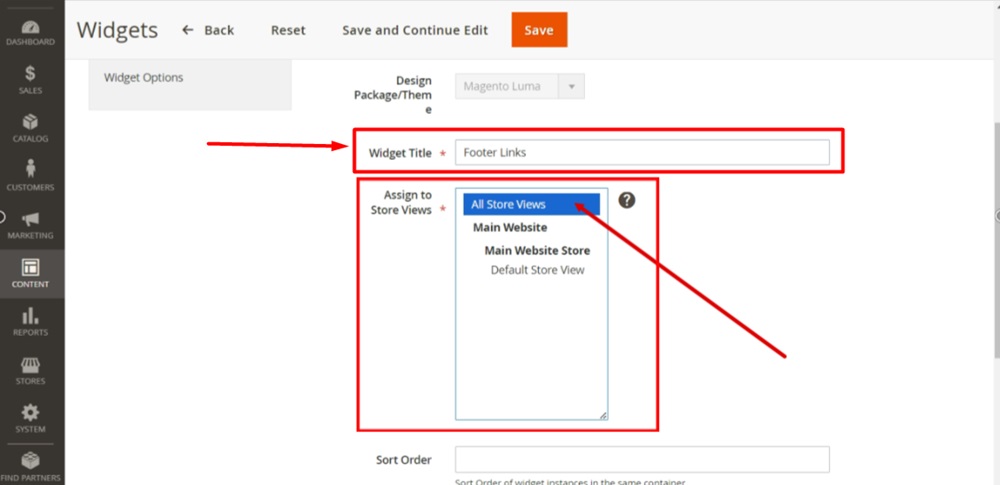
For the Widget Storefront Properties add:
- In the "Widget Title" type "Footer Links" (for example)
- For the "Assign to Store Views" select the "All Store Views" option
-
In the "Layout updates" section click the "Add Layout Update" button:
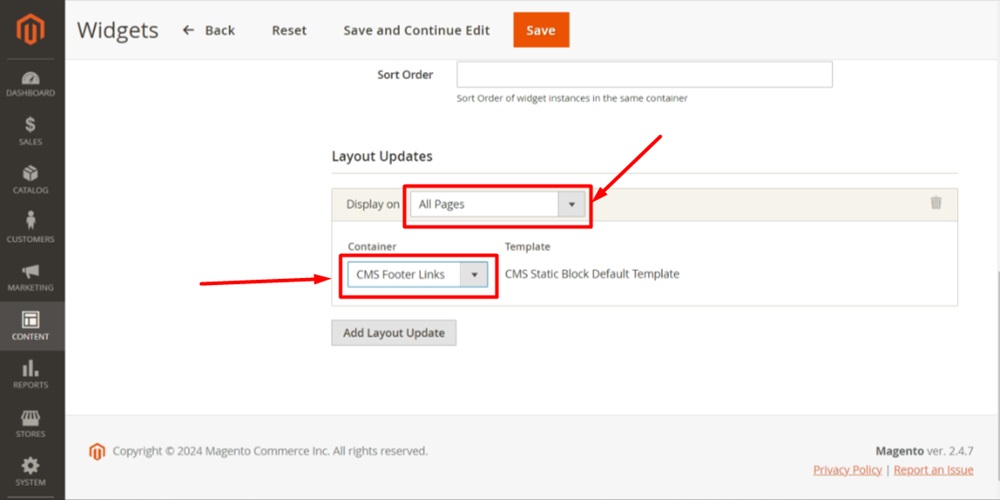
This step will add a new layout and open additional settings. Add the following:
- For the "Display" section, from the dropdown menu select "All pages"
- For the "Container" section, from the dropdown menu select the "CMS Footer Links," and
- The chosen template will be shown here and it is the "CMS Static Block Default Template"
-
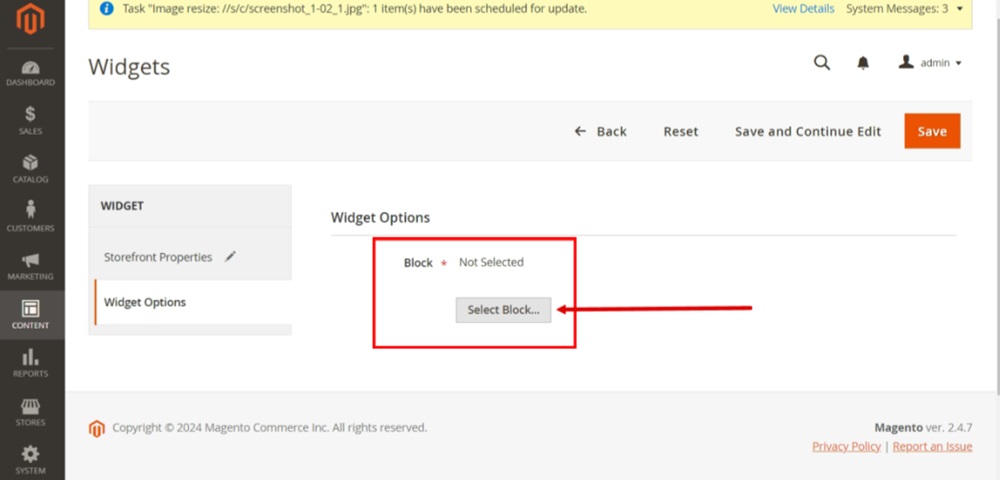
Scroll up to the "Widget options" section (on the right side). Click the "Select Block" button (on the left side):
-
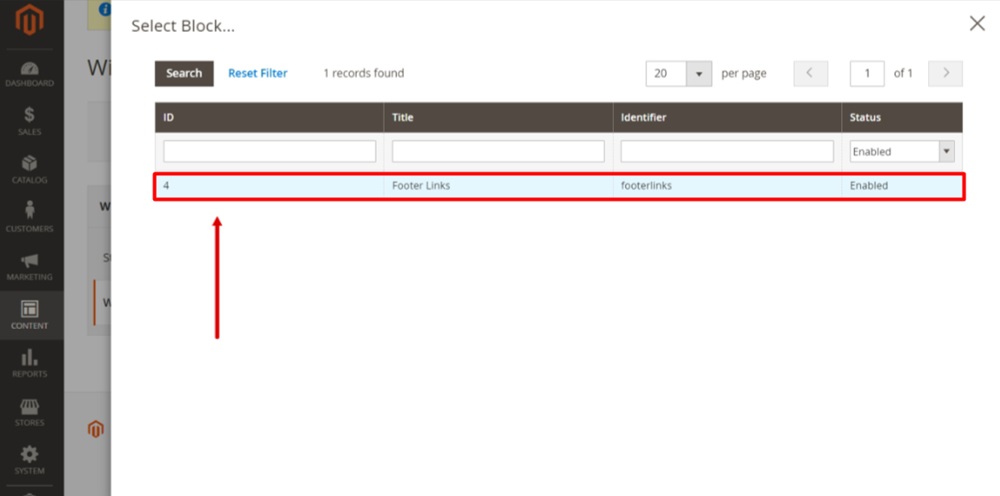
The "Select block" opens in a new window. Select the "Footer Links" block from the Block list:
-
Click Save (in the Widget editor):
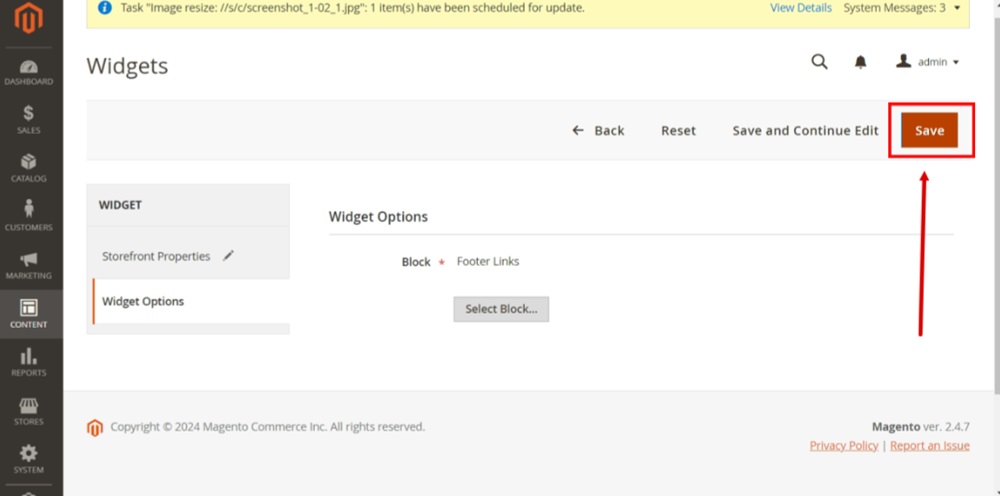
We have added the Footer Links Block to the Footer Links Widget, which means that all links added to the Block will be displayed at the footer section of the website.
Please make sure to flush the Magento's Cache.
Step 4. Display the Privacy Policy URL at the website footer
-
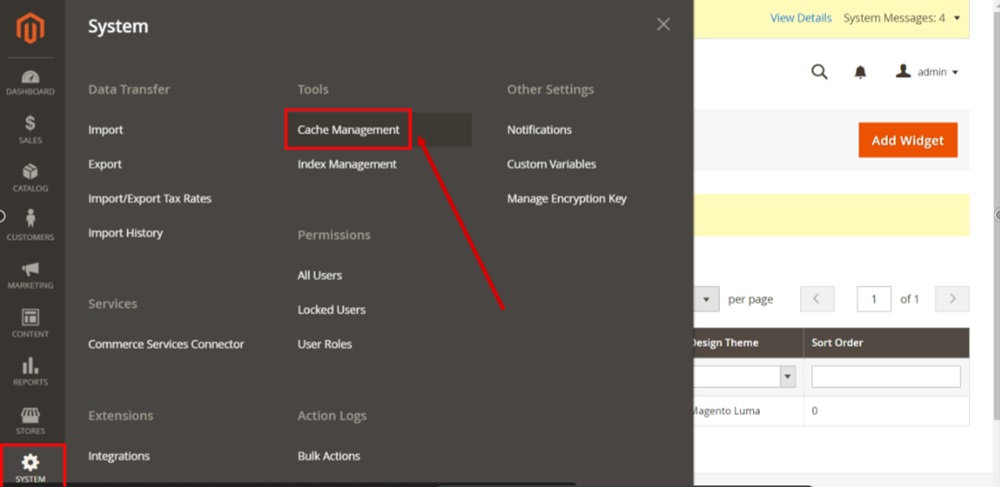
Go to System > Cache Management to clear the cache:
-
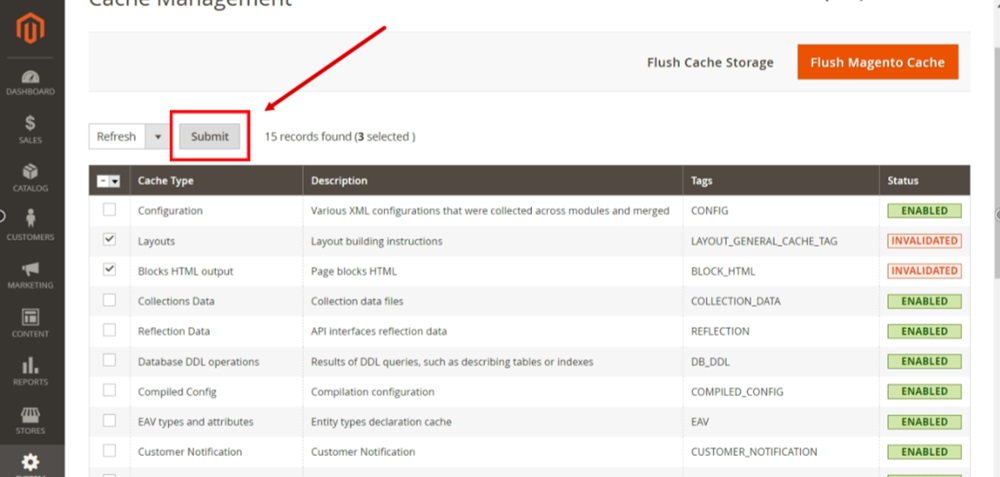
Select the columns with "Invalidated" status and click the "Submit" button:
-
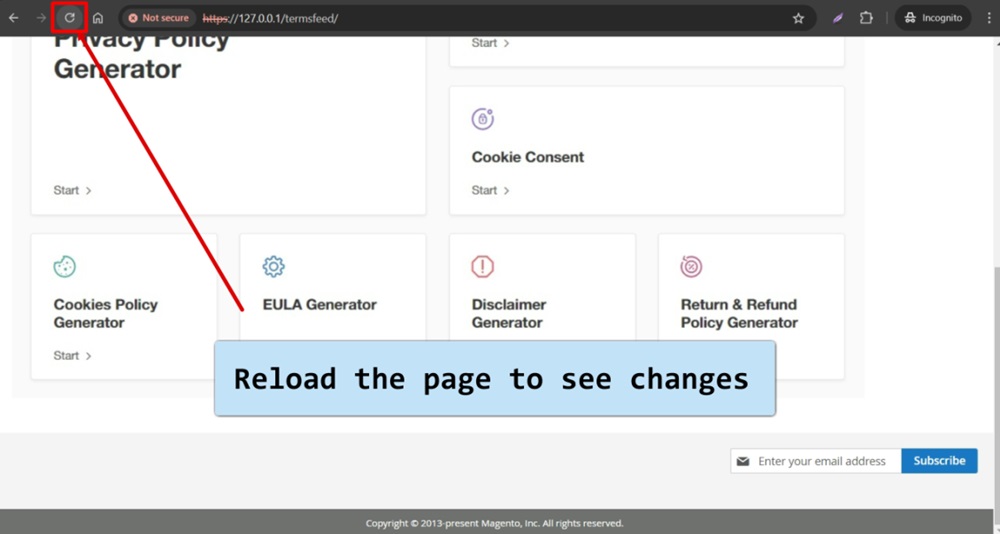
Reload the page to see changes:
-
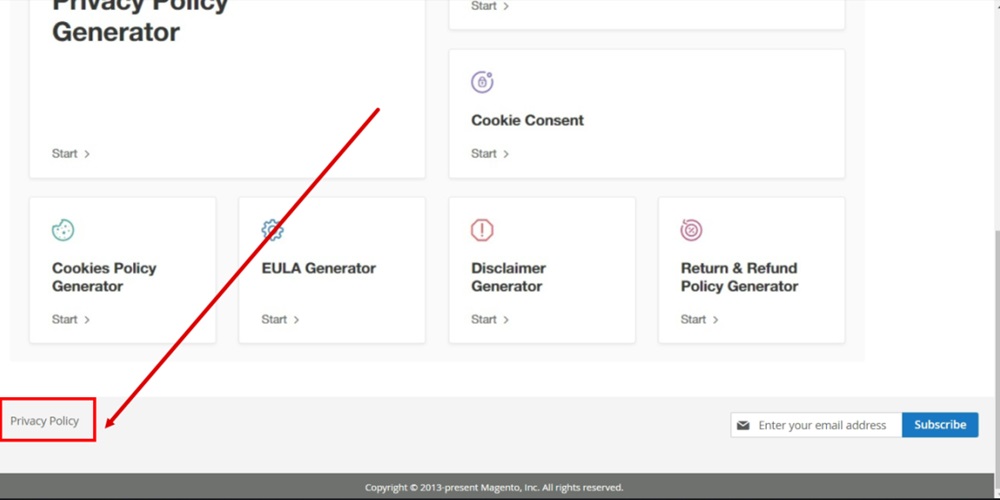
The Privacy Policy page is linked at the footer of the Magento 2 website:
