The instructions below can be roughly separated into the following smaller tasks (sections/parts):
- Add a new Article
- Create a new Menu
- Add a new Module and position the Menu through the Module
- Connect the Article with the Menu
The above concepts (ie. Article, Menu, Module) are similar to other platforms such as WordPress:
- Article(s) → equivalent to Page(s) in other platforms
- Module(s) → equivalent to a container that displays content (Menus) on a chosen position
- Menu → equivalent to navigation in other platforms
In this video, we'll show how to add a new page, when the Menu and its placeholder Module already exist.
Here are the steps to add a Terms and Conditions page on Joomla 4:
-
Log in to your Joomla website.
-
Let's start with the first step - add a new page on the Joomla 4 site.
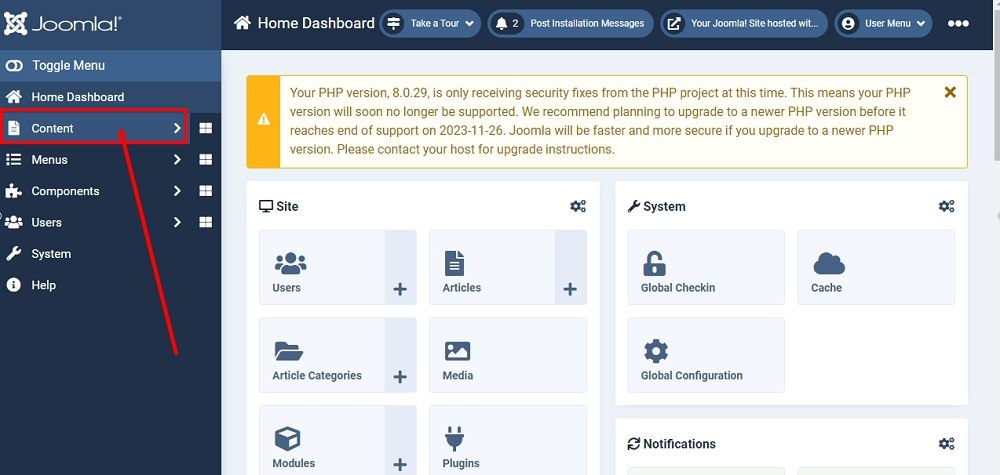
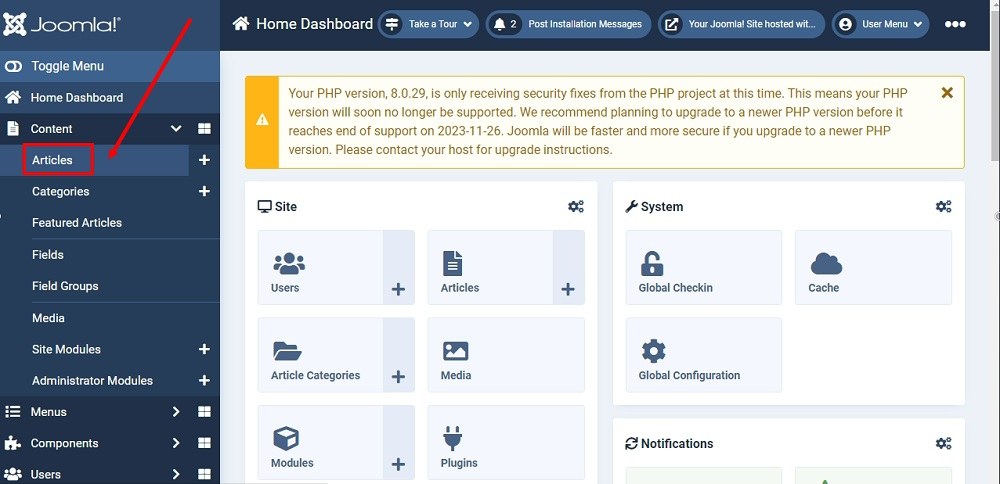
From the Joomla's Dashboard, go to Content:
-
From the Content menu, select Articles:
-
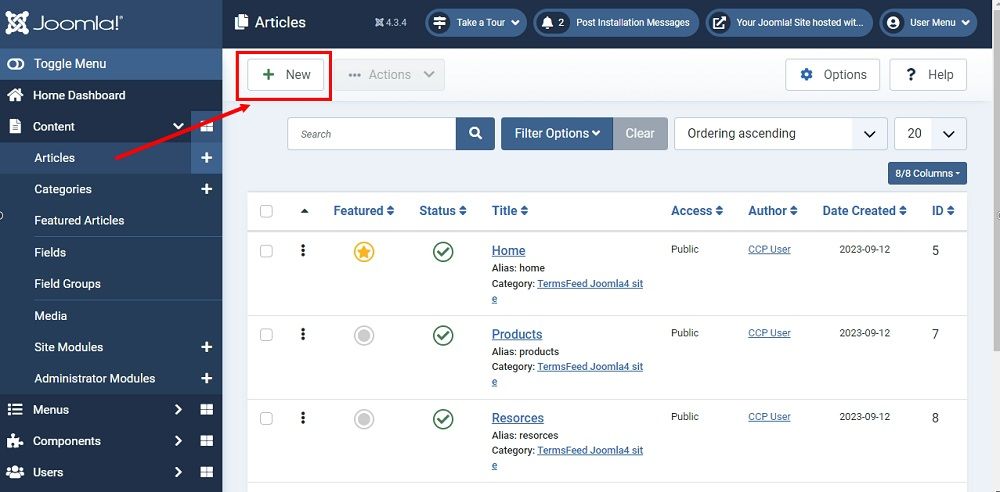
From the Articles page, click on the + New button:
-
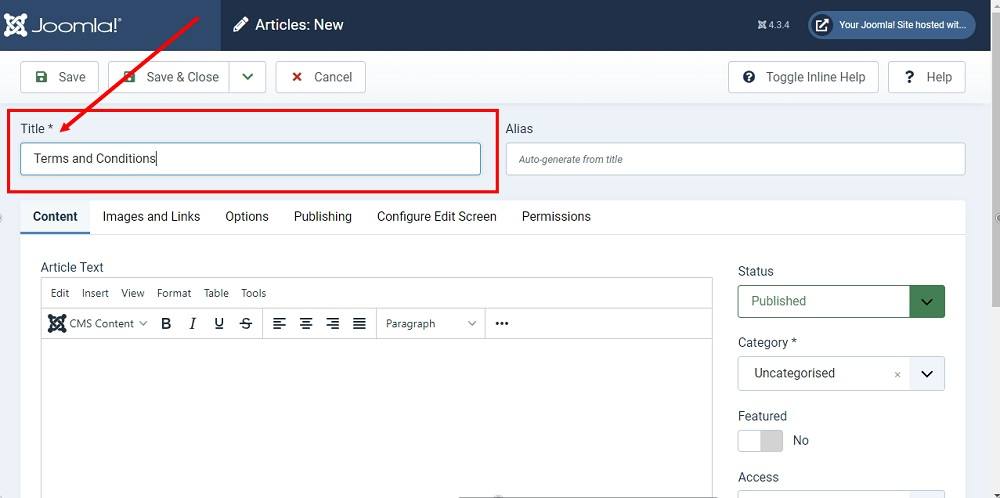
The New Article editor page will open. Each article needs to have a Title and a Category. Type Terms and Conditions in the Title field:
-
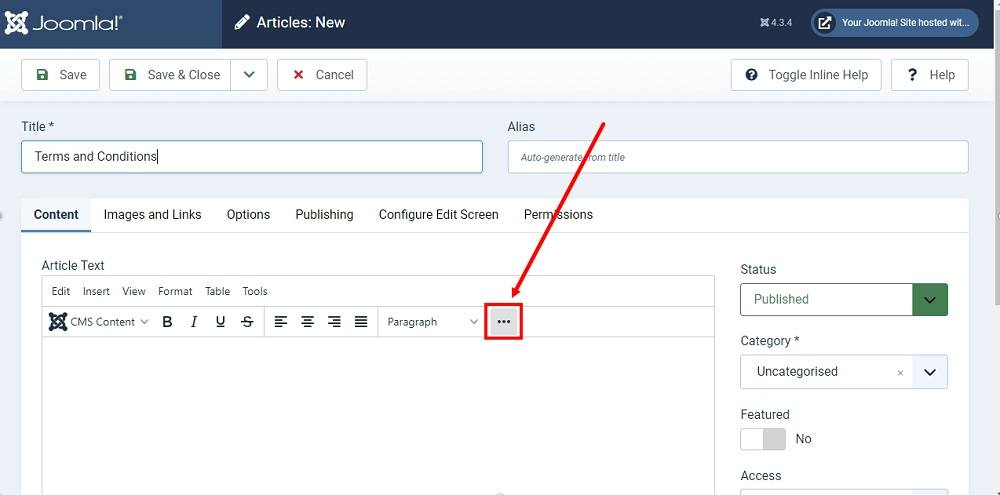
In the Content section, under Article text, click on the three dots to expand the Article editor:
-
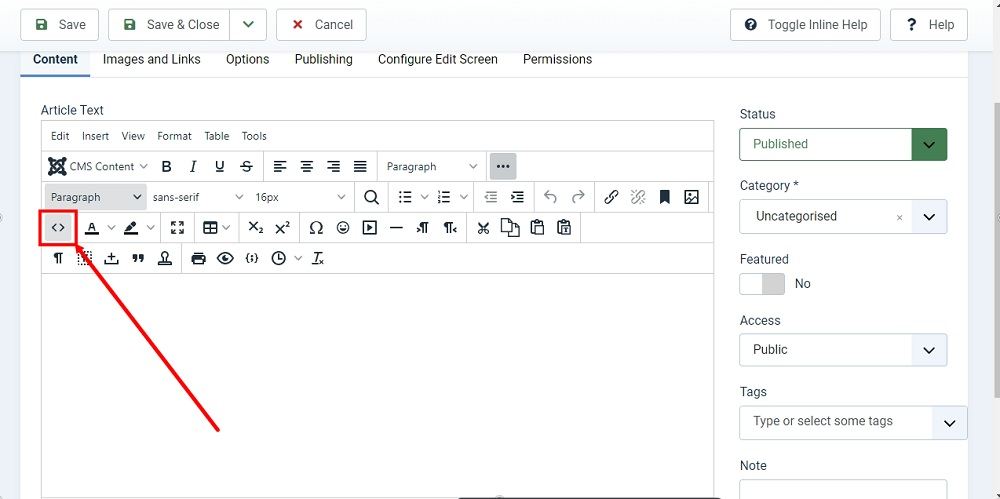
Click on the code (<>) icon to open the source code editor:
-
Add the Terms and Conditions HTML code in the source code editor.
If you do not have a Terms and Conditions, you can use our Terms and Conditions Generator and create it within minutes.
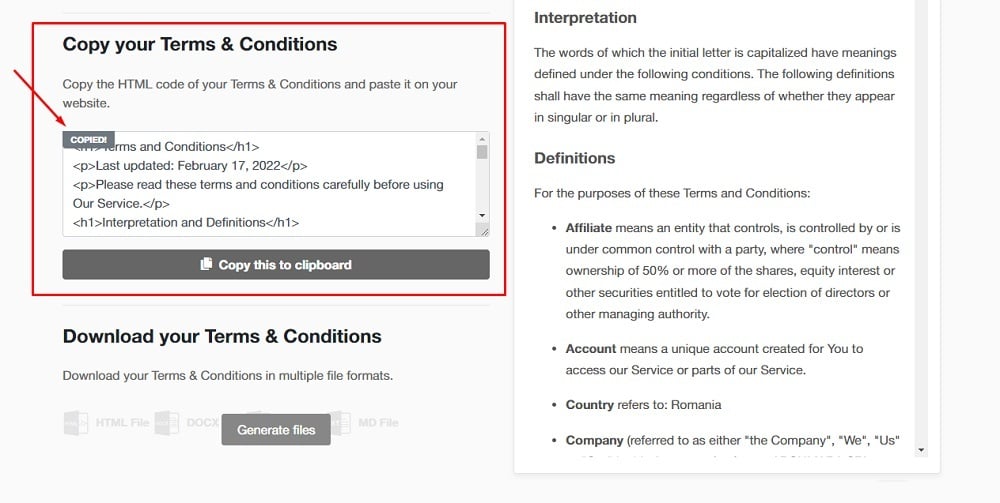
Once you have the Terms and Conditions created by TermsFeed, let's get the agreement text. Under the Copy your Terms and Conditions section, click on Copy this to clipboard:
-
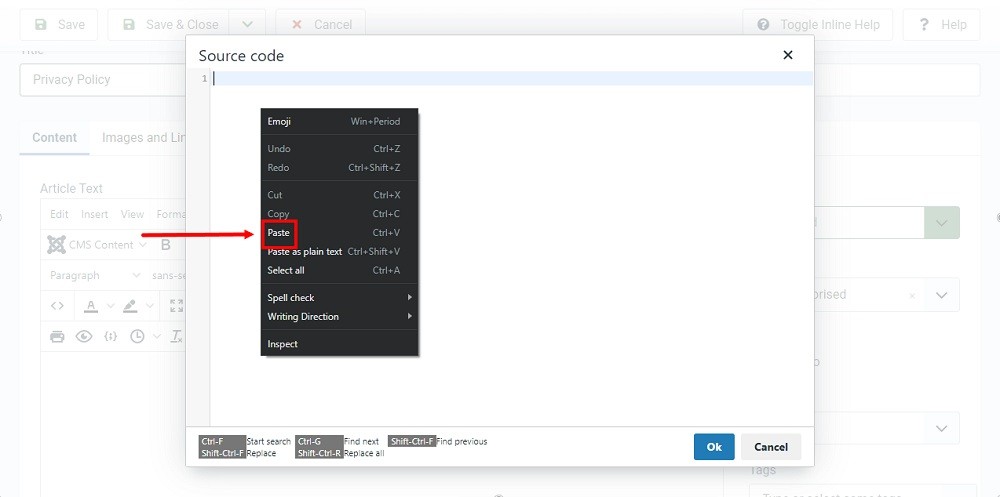
Paste the generated Terms and Conditions HTML code in the Source code editor:
-
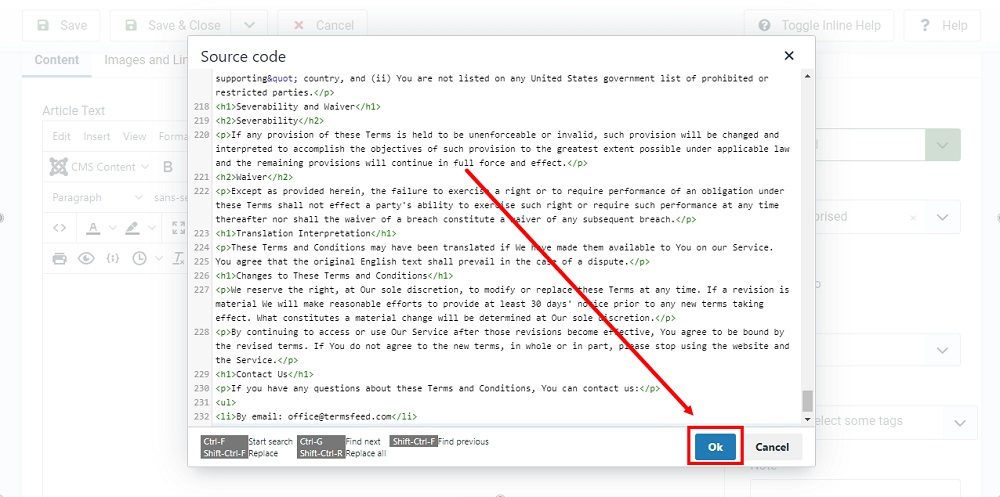
Click OK:
-
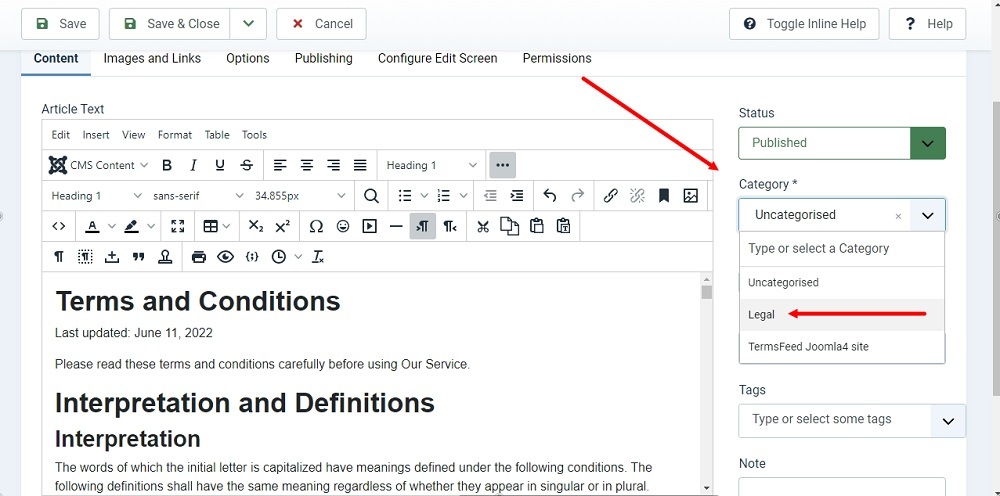
The HTML text of your Terms and Conditions is displayed in the WYSIWYG editor. Since all Articles need to be in at least one category (otherwise it will be automatically added to the Uncategorized category) we created a new category named Legal. On the right side, under the Category section, click on the dropdown menu and select it:
-
In the top menu, click on the Save & Close button:
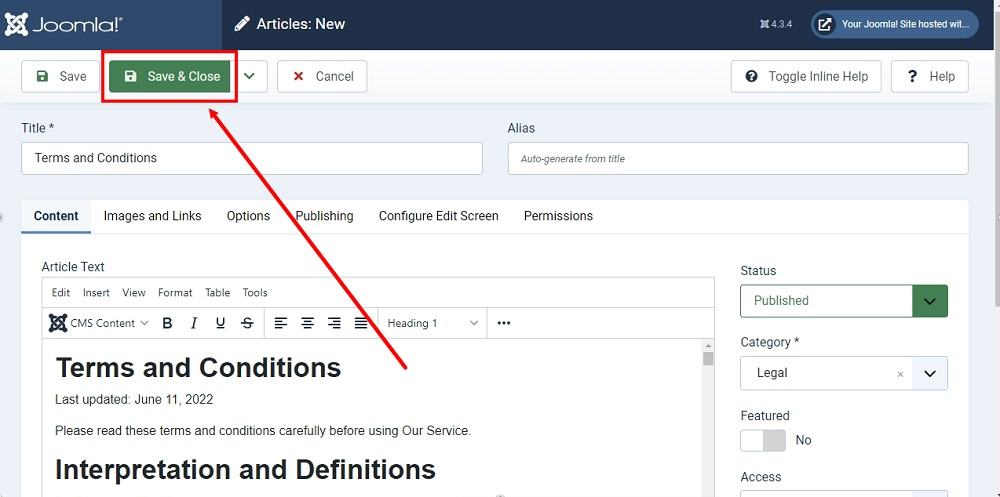
You're done. A new Article is created and added to the Legal category.
-
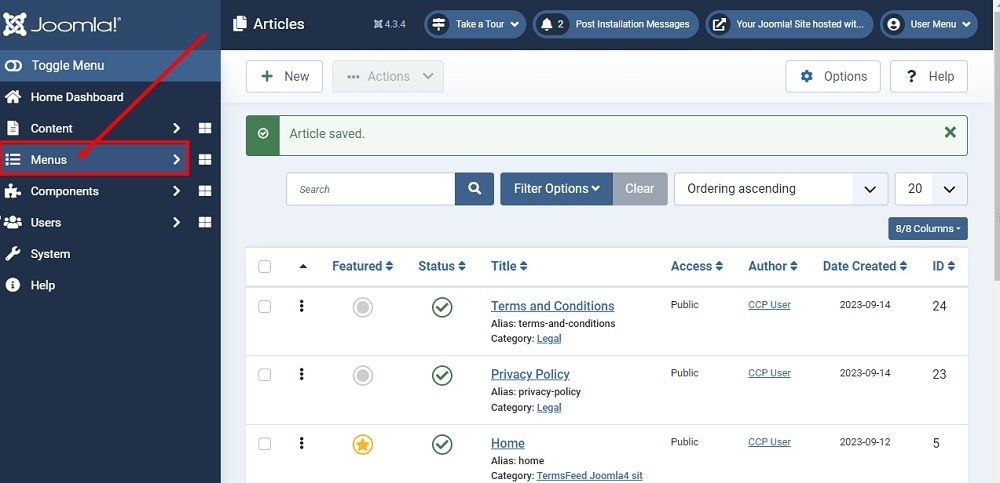
Now let's add the Article to the Footer Menu. From the website's Dashboard, go to Menus:
-
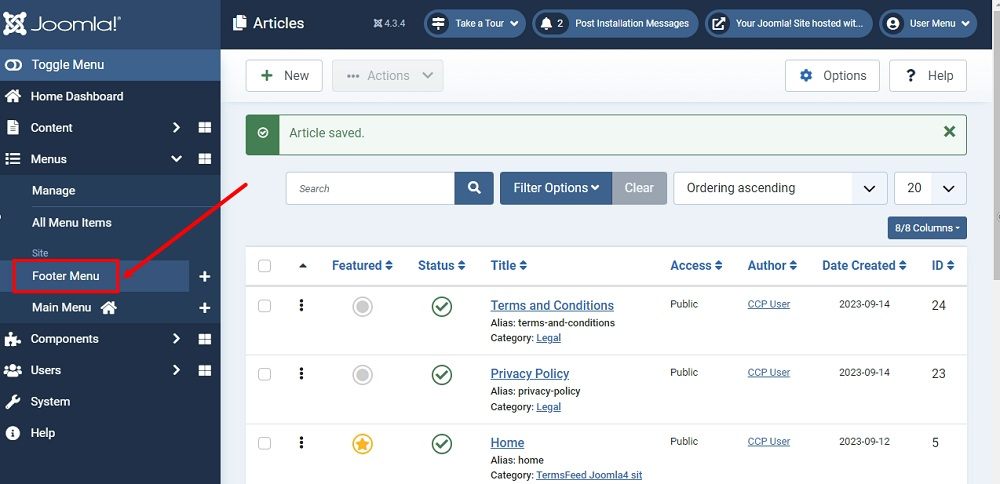
Select the Footer Menu from the Site menus:
-
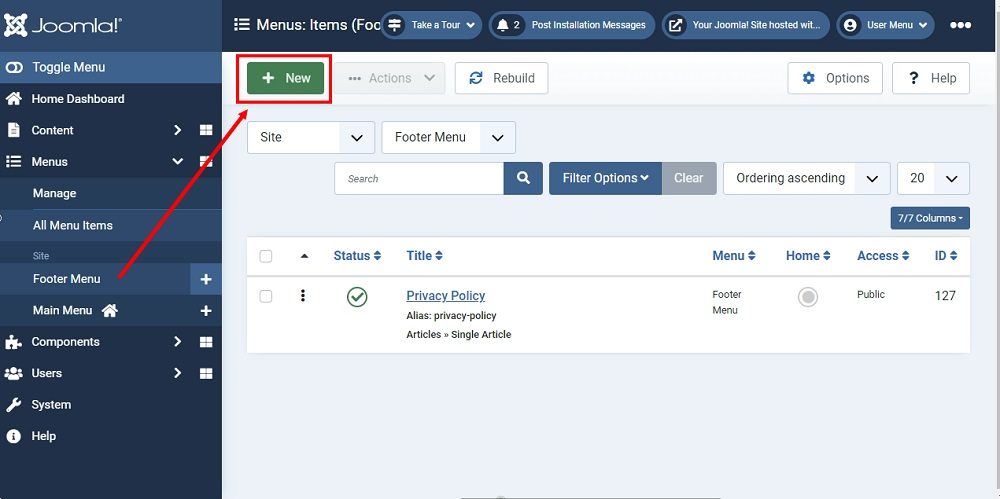
From the Menu Items editor page, click on the + New button:
-
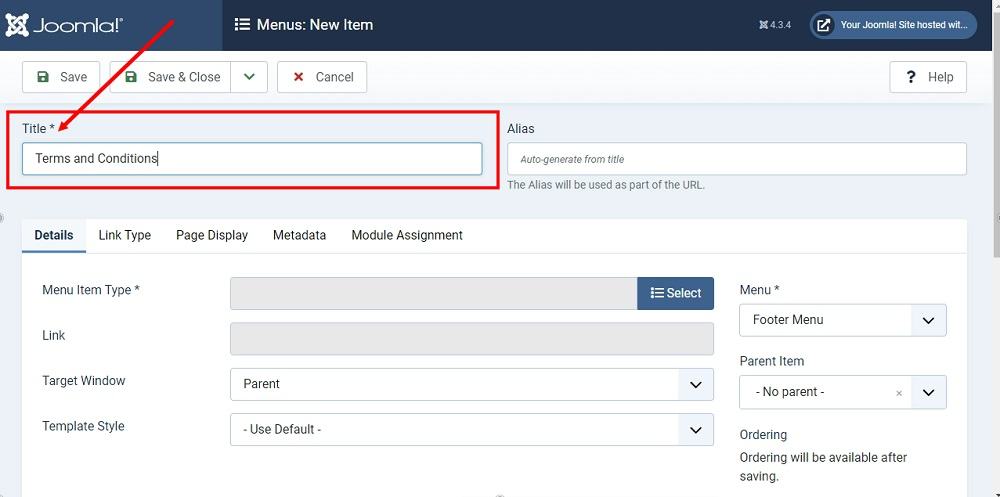
Name your New Menu Item using the Title field. Since we want to add our Terms and Conditions page (Article) to the Footer Menu, we named this new menu item Terms and Conditions:
-
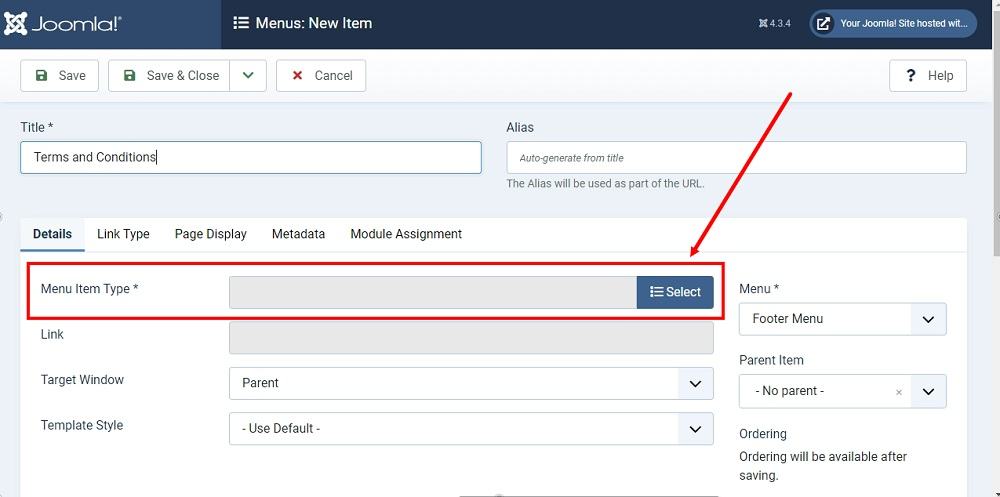
From the Details section, click on the Select button to add a new menu type:
-
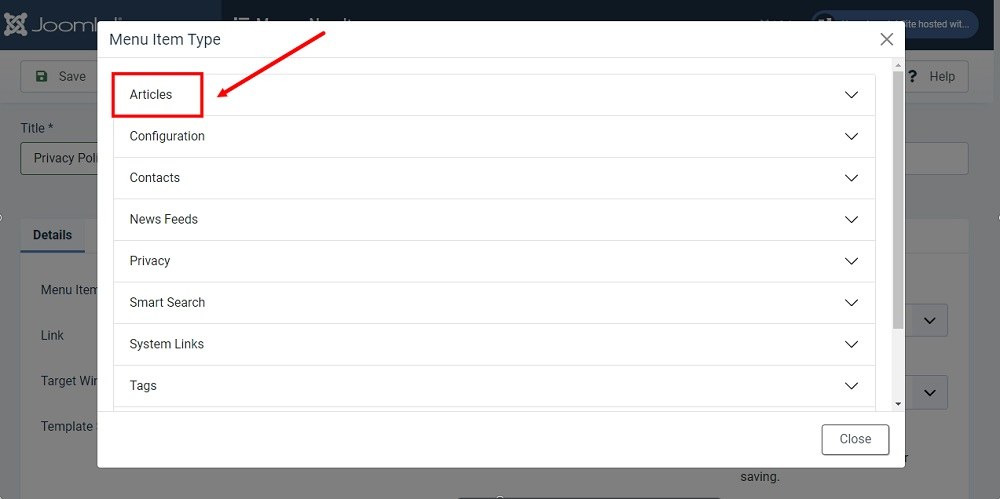
From the new Menu Item Type window, select Articles:
-
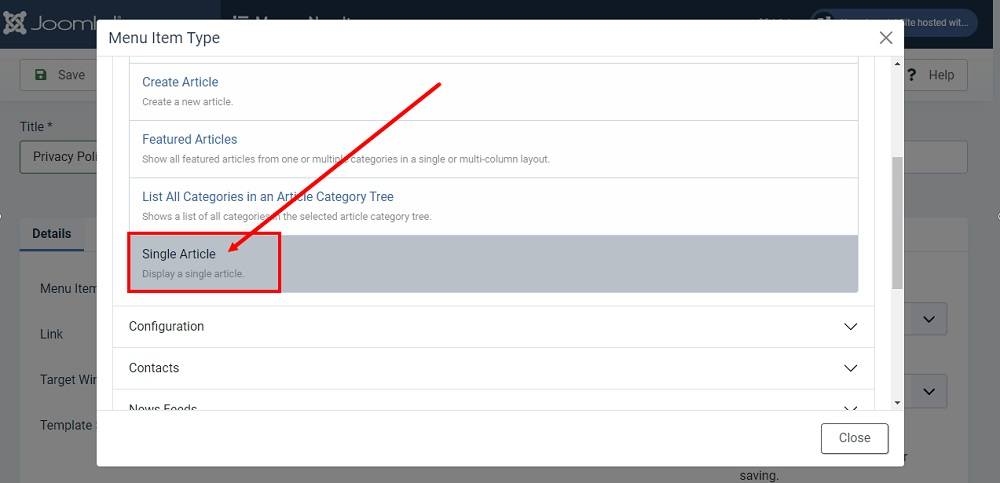
Select Single Article:
-
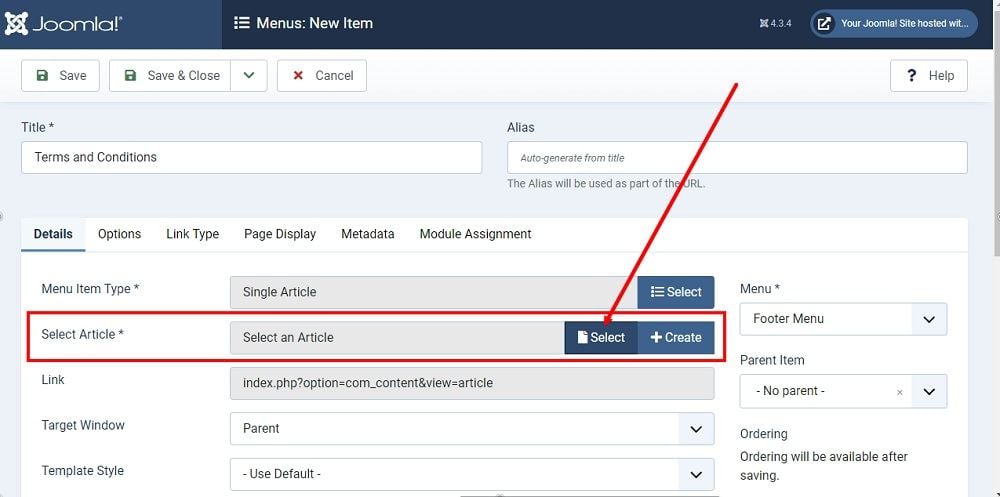
The Select Article field will appear. It has 2 options: Select or Create. For this example, we used the Select option.
-
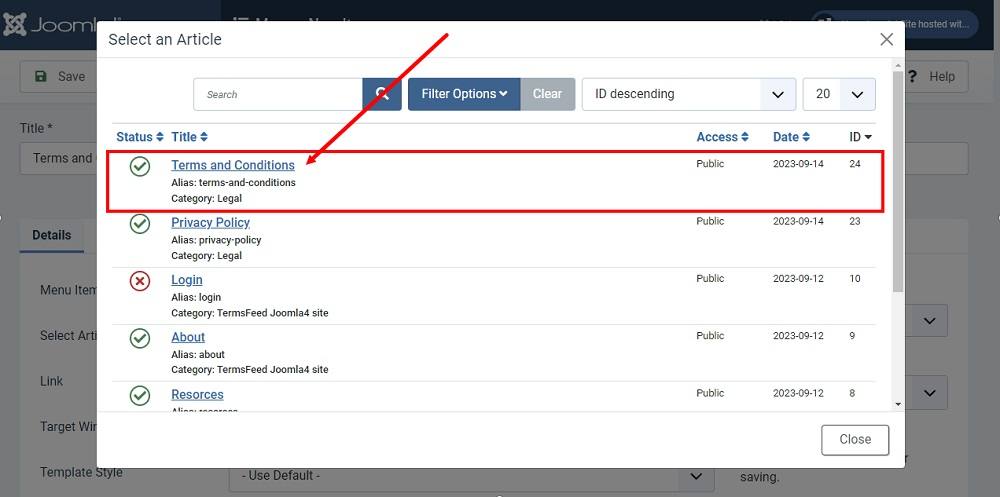
The Select an Article window will open with a list of all Articles created on your website. Select the Terms and Conditions Article:
-
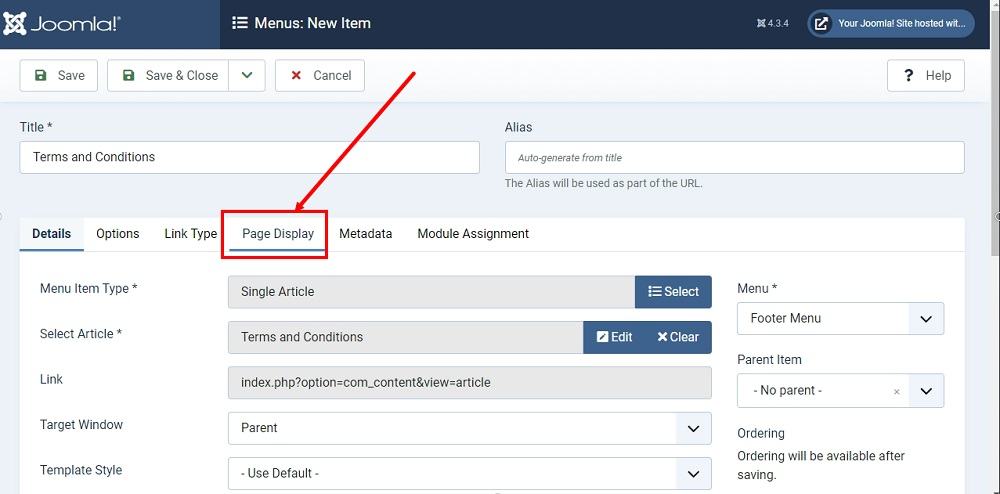
From the same Menu Item editor page, go to the Page Display tab to adjust the settings:
-
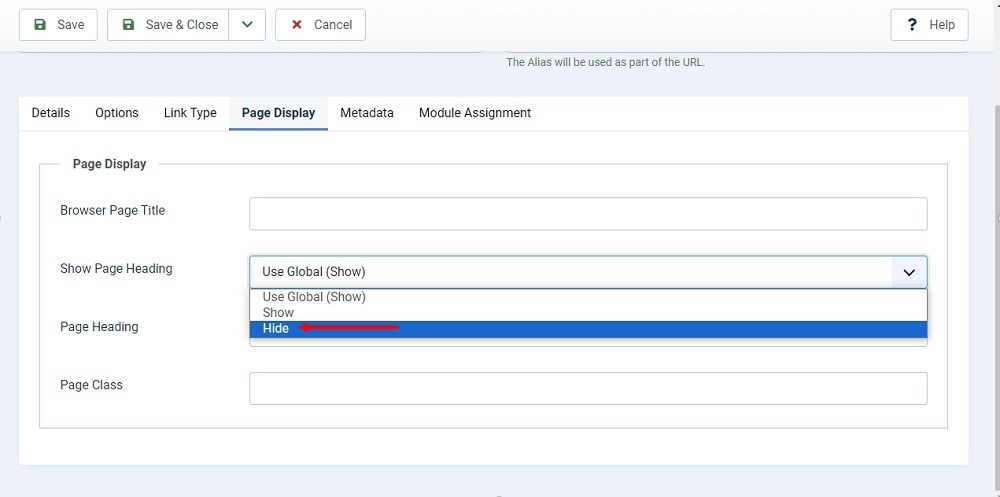
Under the Page Display tab, at the Show Page Heading, select the Hide option.
The HTML code that is added as part of the Terms and Conditions page (article) already has a page heading, so you do not need it to be displayed twice. That's the purpose of the Hide option.
-
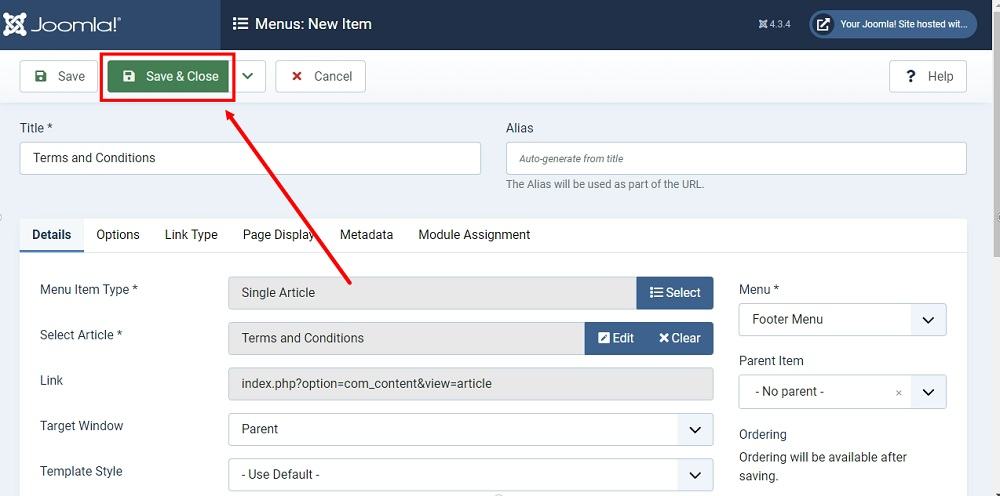
Click Save & Close:
-
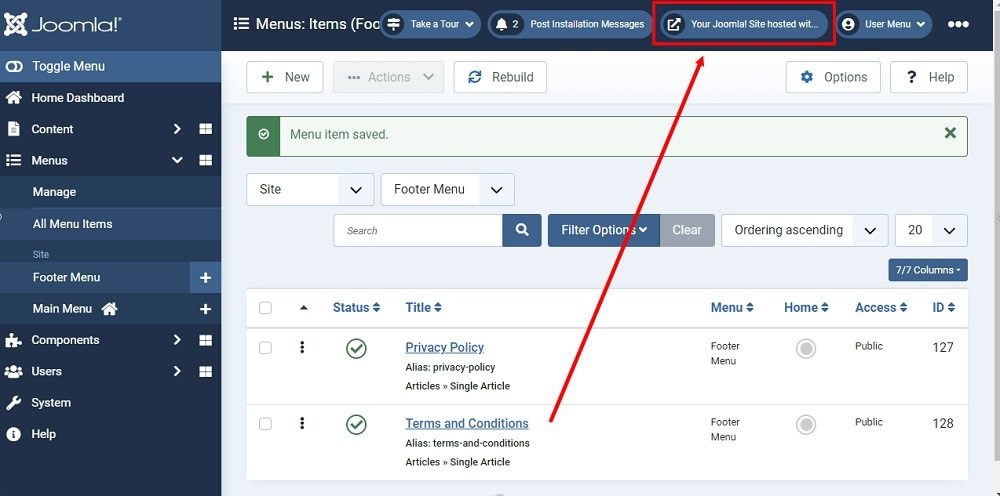
The Terms and Conditions Article is now added as a new item to the Footer Menu. To preview changes, go to the Preview button at the top menu:
-
You're done!
