The following instructions will guide you step-by-step on how to add an open-source license to a GitHub repository.
-
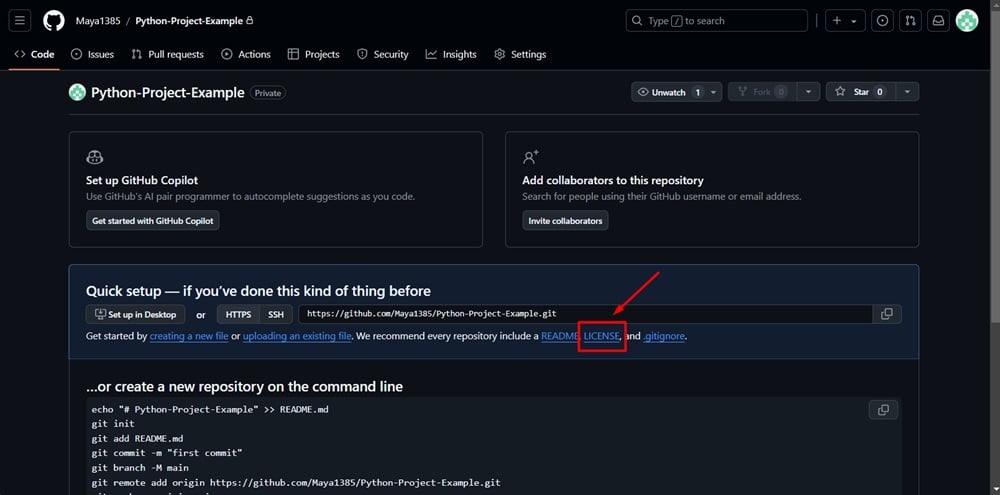
Log in to your GitHub account. Go to your repository. Click on the LICENSE link:
-
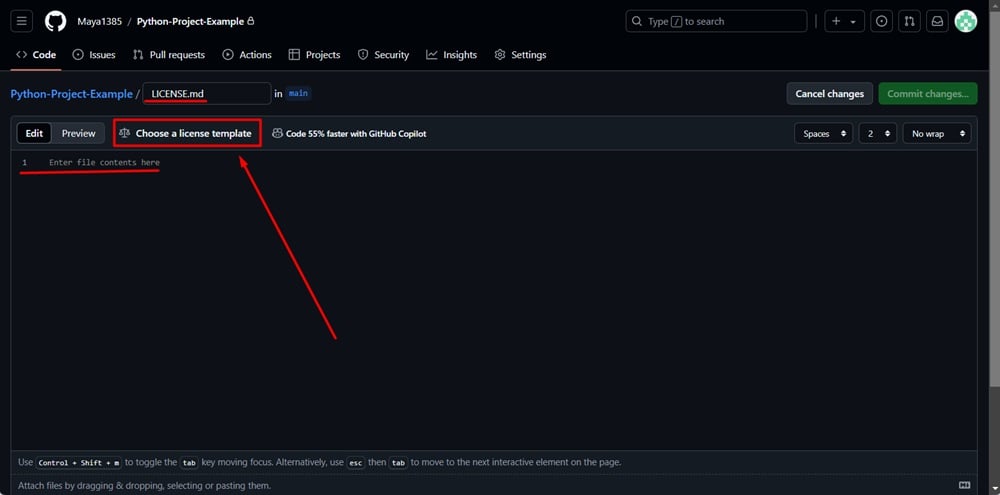
The License window opens. Paste your open-source license in the field. Or, click the Choose a license template tab:
-
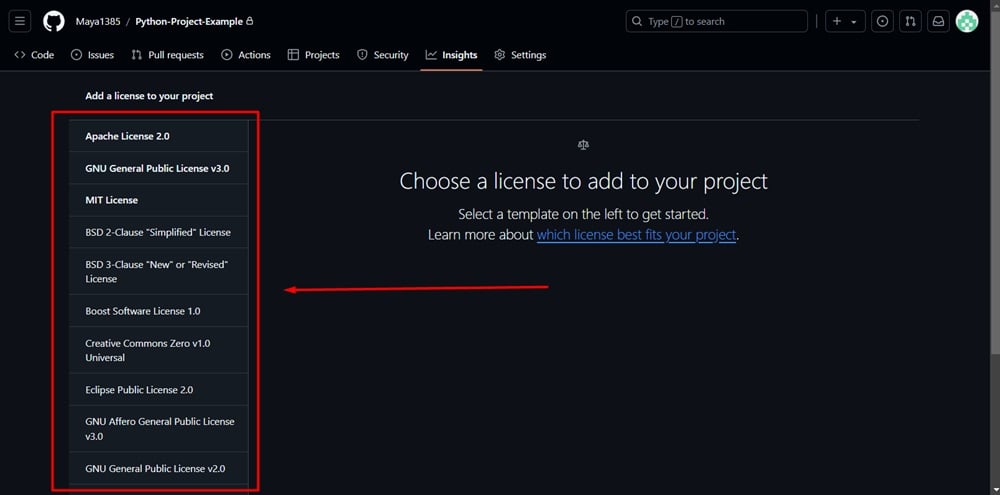
The new window to choose a license to add to your project will open:
-
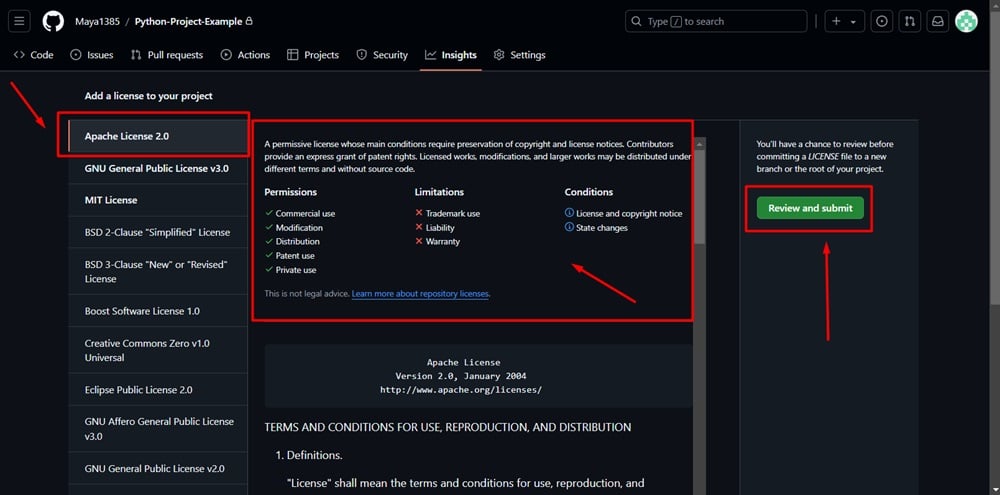
For example purposes, we selected Apache License 2.0. The preview of the license template with the permissions, limitations, and conditions appear. You can edit the template if needed. When done, click the Review and Submit button on the right side:
-
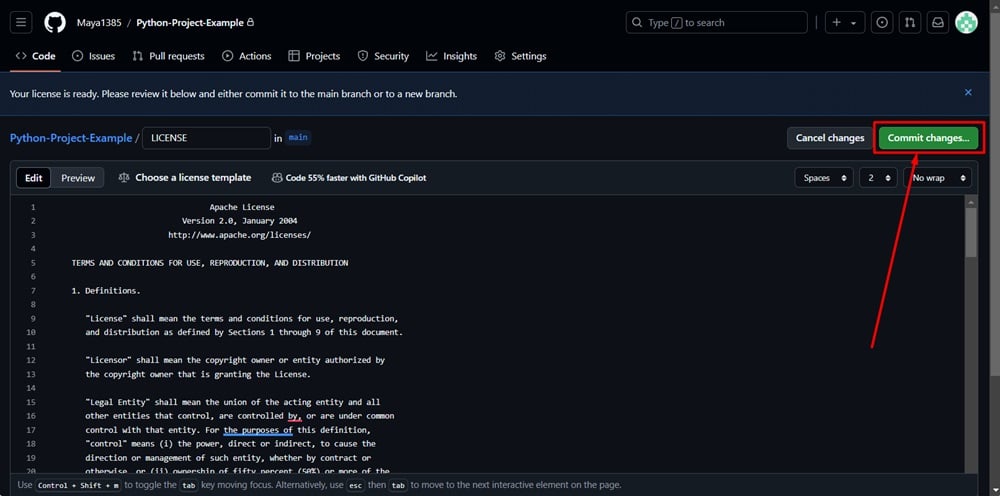
Your license is ready. Click Commit changes (at the top right):
-
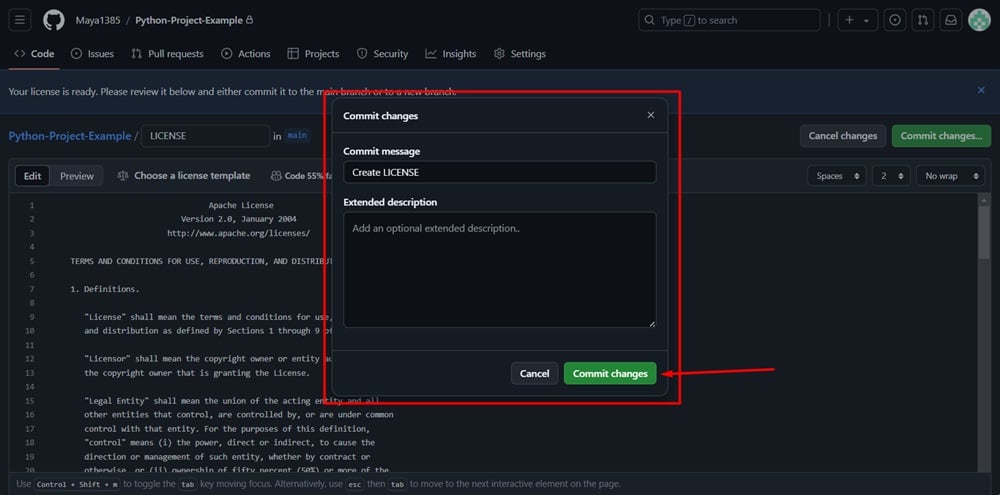
The new window opens. You can add/edit a message and add an extended description if needed. Click Commit changes again:
-
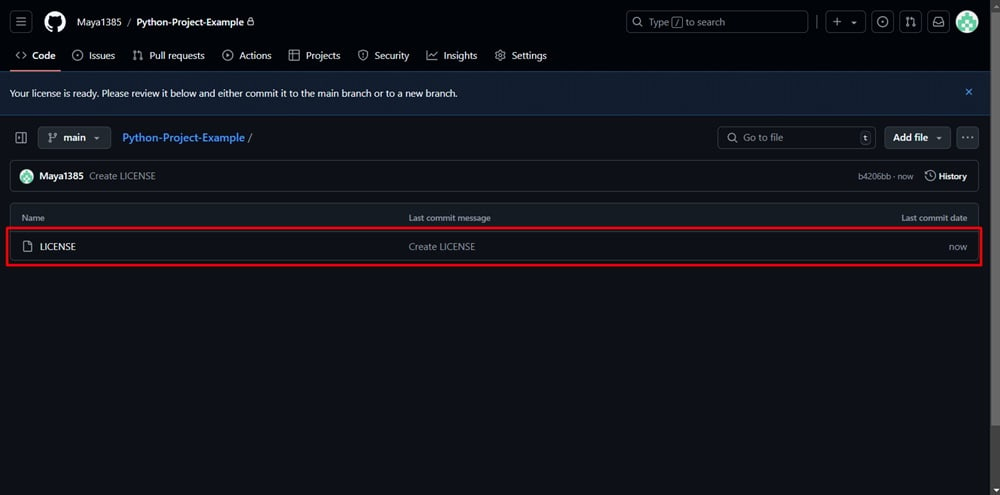
The new LICENSE file is created:
-
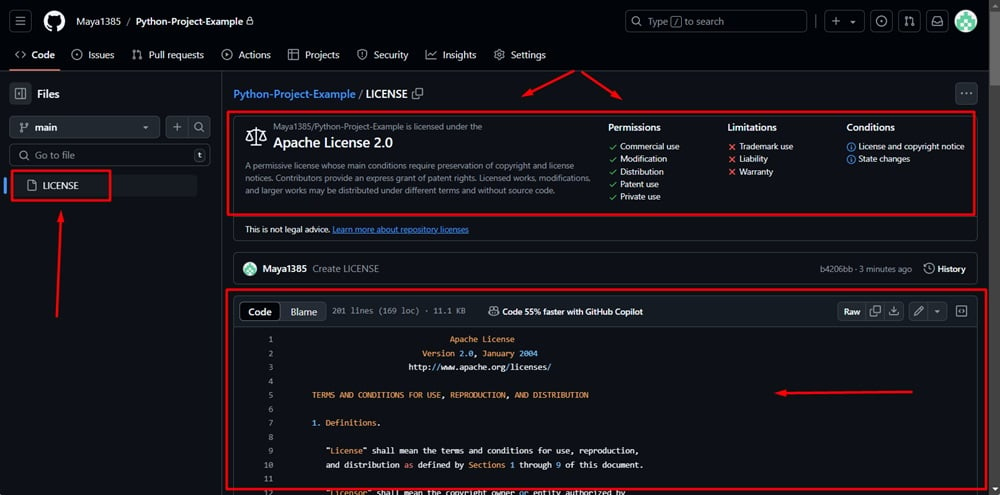
You can see the preview on your repository:

Comprehensive compliance starts with a Privacy Policy.
Comply with the law with our agreements, policies, and consent banners. Everything is included.


